Adding users to your organization
To effectively add new users to your organization, please follow these steps:
-
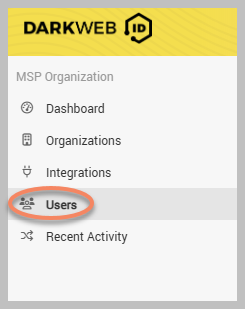
In the left menu, click Users.
-
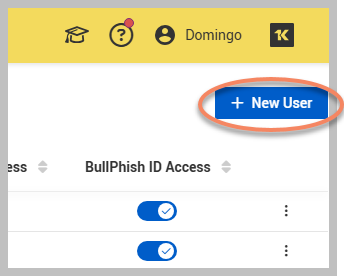
Click + New User in the upper-right corner.
-
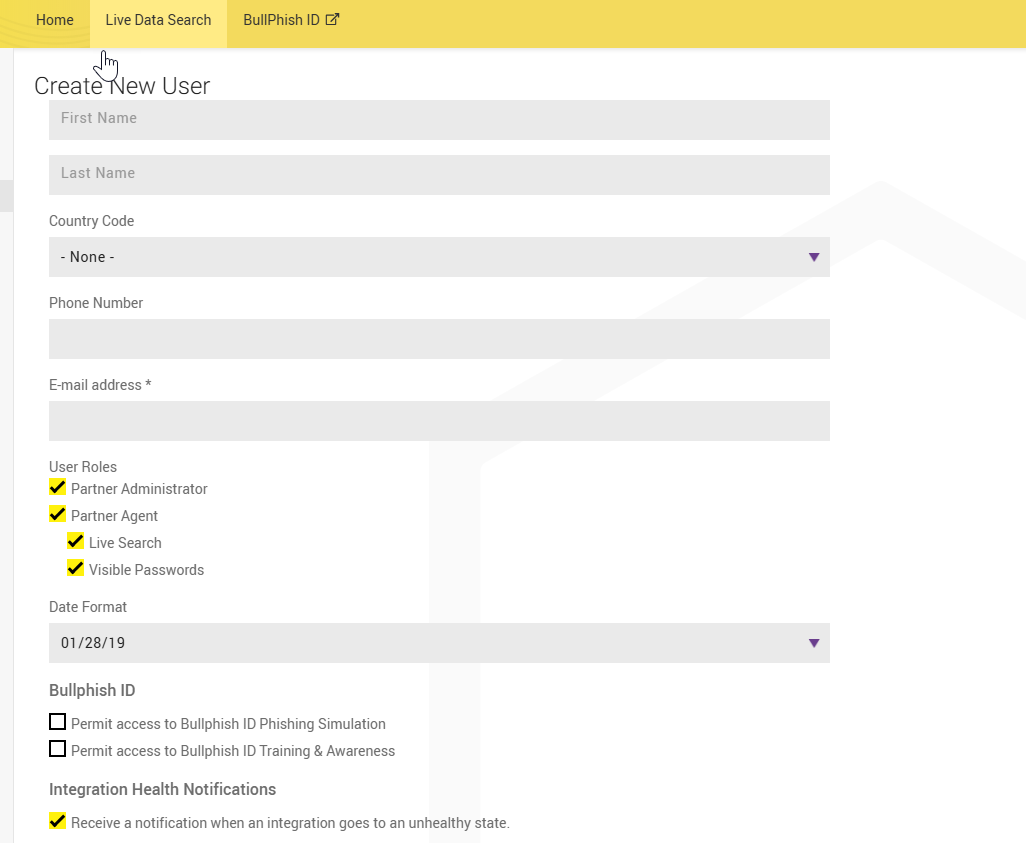
In the Create New User page, fill out all the necessary user information in the fields provided:
-
First Name: Enter the user's first name as it should appear in the platform.
-
Last Name: Enter the user's last name.
-
Country Code: Using the provided drop-down menu, select the appropriate country code for the user’s telephone number. This ensures that the number is formatted correctly.
-
Phone number: Input the user’s phone number, including the area code, to ensure correct communication.
-
Email address: Provide the user's email address, which will be used for notifications and account-related correspondence.
-
User Roles: Assign a specific user role by choosing one of the following options:
-
Partner Administrator
-
Partner Agent
-
Live Search: Enable or disable live search functionality for this user.
-
Visible passwords: Choose whether passwords should be displayed as plaintext or obscured.
-
-
-
Date Format: Select the preferred date format for the user’s profile (None, 01/28/19, or 28-01-2019).
-
BullPhish ID: Select the checkboxes to Permit access to BullPhish ID Phishing Simulation and/or Permit access to BullPhish ID Training & Awareness.
-
Integration Health Notifications: Select the checkbox to opt into health notifications when an integration goes to an unhealthy state.
-
Web Services: Select the checkbox to permit access to web services and enter any IP Addresses you wish separated with semi-colons, with no trailing semi-colon, in the IP Address whitelist field.
-
-
Once all information is accurately entered and reviewed, click Save User in the bottom-right corner of the page to complete the process. This action will create the new user profile and add it to the system.

Following these steps will ensure that users are added efficiently and accurately, allowing for effective management and communication within the platform.


