Configuring ConnectWise integration with Dark Web ID
This guide provides step‑by‑step instructions for enabling the Dark Web ID integration with ConnectWise PSA. When enabled, Dark Web ID automatically creates a ConnectWise service ticket for each newly discovered compromise, allowing you to triage, track, and remediate security incidents directly from ConnectWise.
Integration overview
The ConnectWise integration enhances Dark Web ID by automatically creating a PSA service ticket for each new compromise detected. This improves visibility, reduces response time, and centralizes incident management within ConnectWise.
NOTE The integration is one‑way. Dark Web ID sends compromise data to ConnectWise but does not receive ticket updates or status changes.
Prerequisites
Before configuring the integration, ensure the following:
-
You have access to both Dark Web ID and ConnectWise PSA.
-
You have administrative permissions in ConnectWise to create:
-
Security roles
-
API members
-
API keys
-
-
You can identify or create a ConnectWise company that maps to the Dark Web ID organization.
IMPORTANT Complete the sections in this article in the order presented. Later configuration steps depend on permissions, roles, and API objects created in earlier sections.
Recommended integration approach
ConnectWise recommends using an API Member, not a standard user account, for third‑party integrations.
Best Practice
-
Use a dedicated API Member for Dark Web ID
-
Assign the API Member a custom security role with only the required permissions
-
Generate API keys for the API Member (not for a personal or global user account)
Benefits of API members
-
Provide granular access control
-
Do not require a user license
-
Allow integrations to be enabled or disabled independently of user accounts
How to...
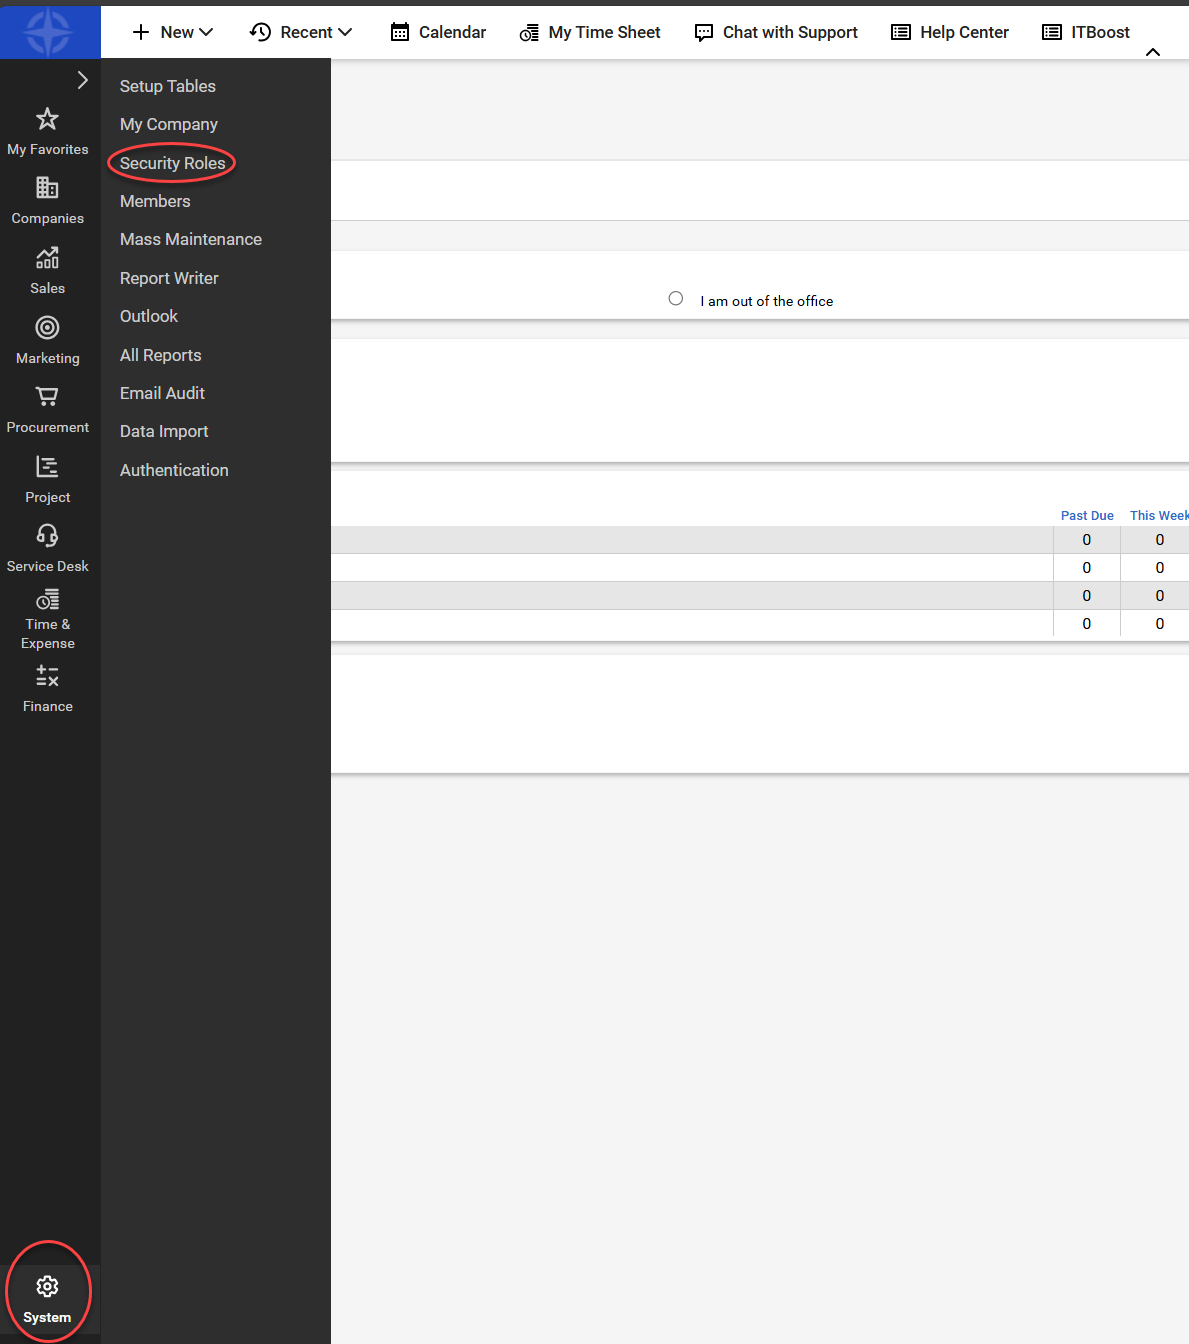
- In ConnectWise PSA, navigate to System > Security Roles.
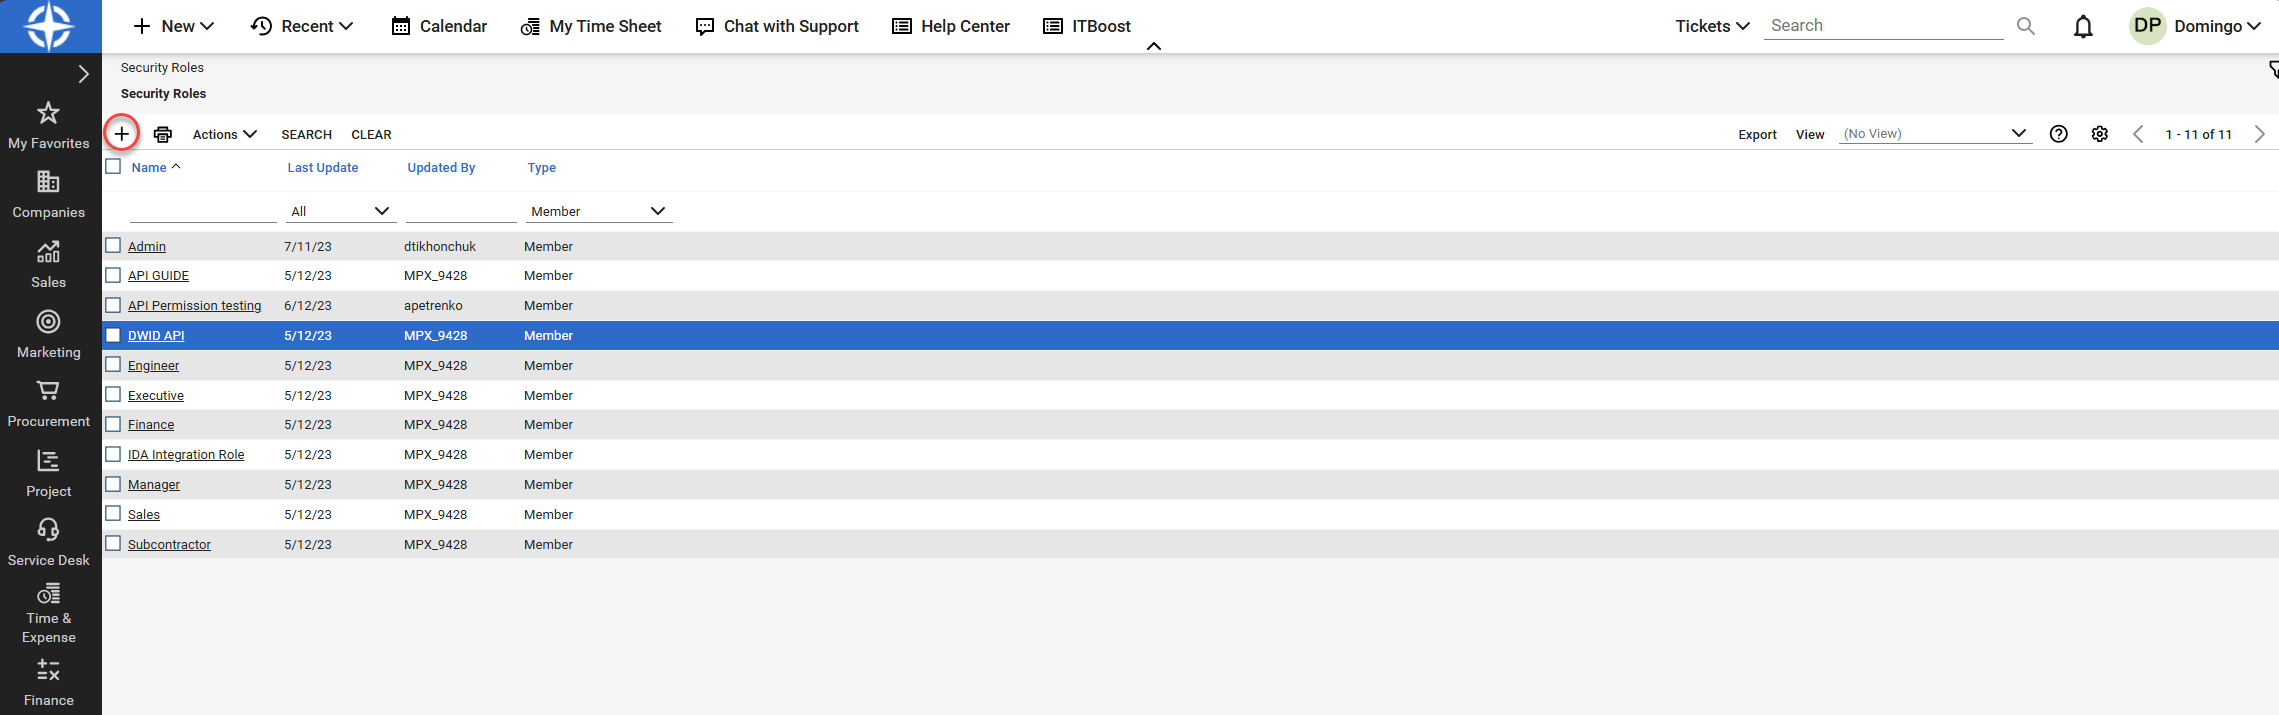
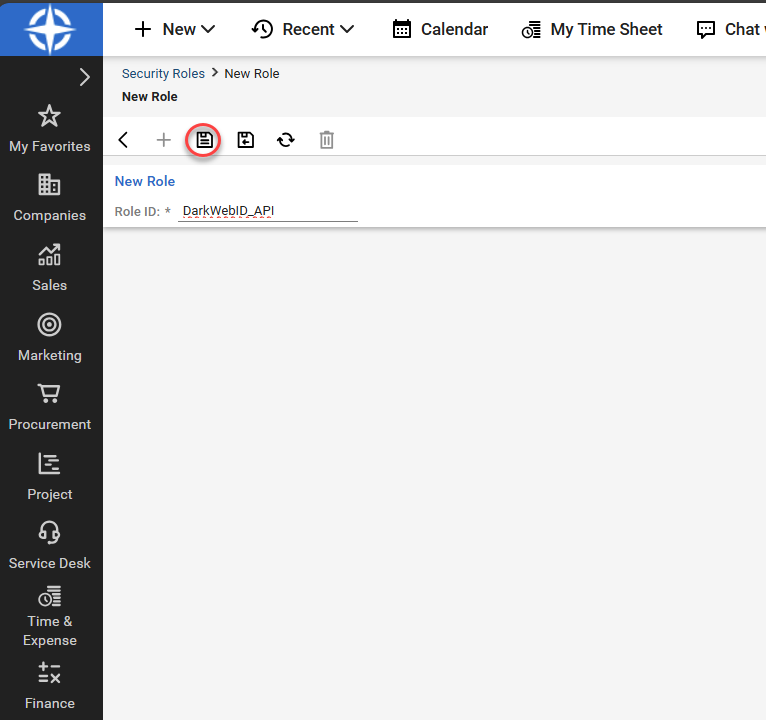
- Click the + sign icon to create a new Security Role.
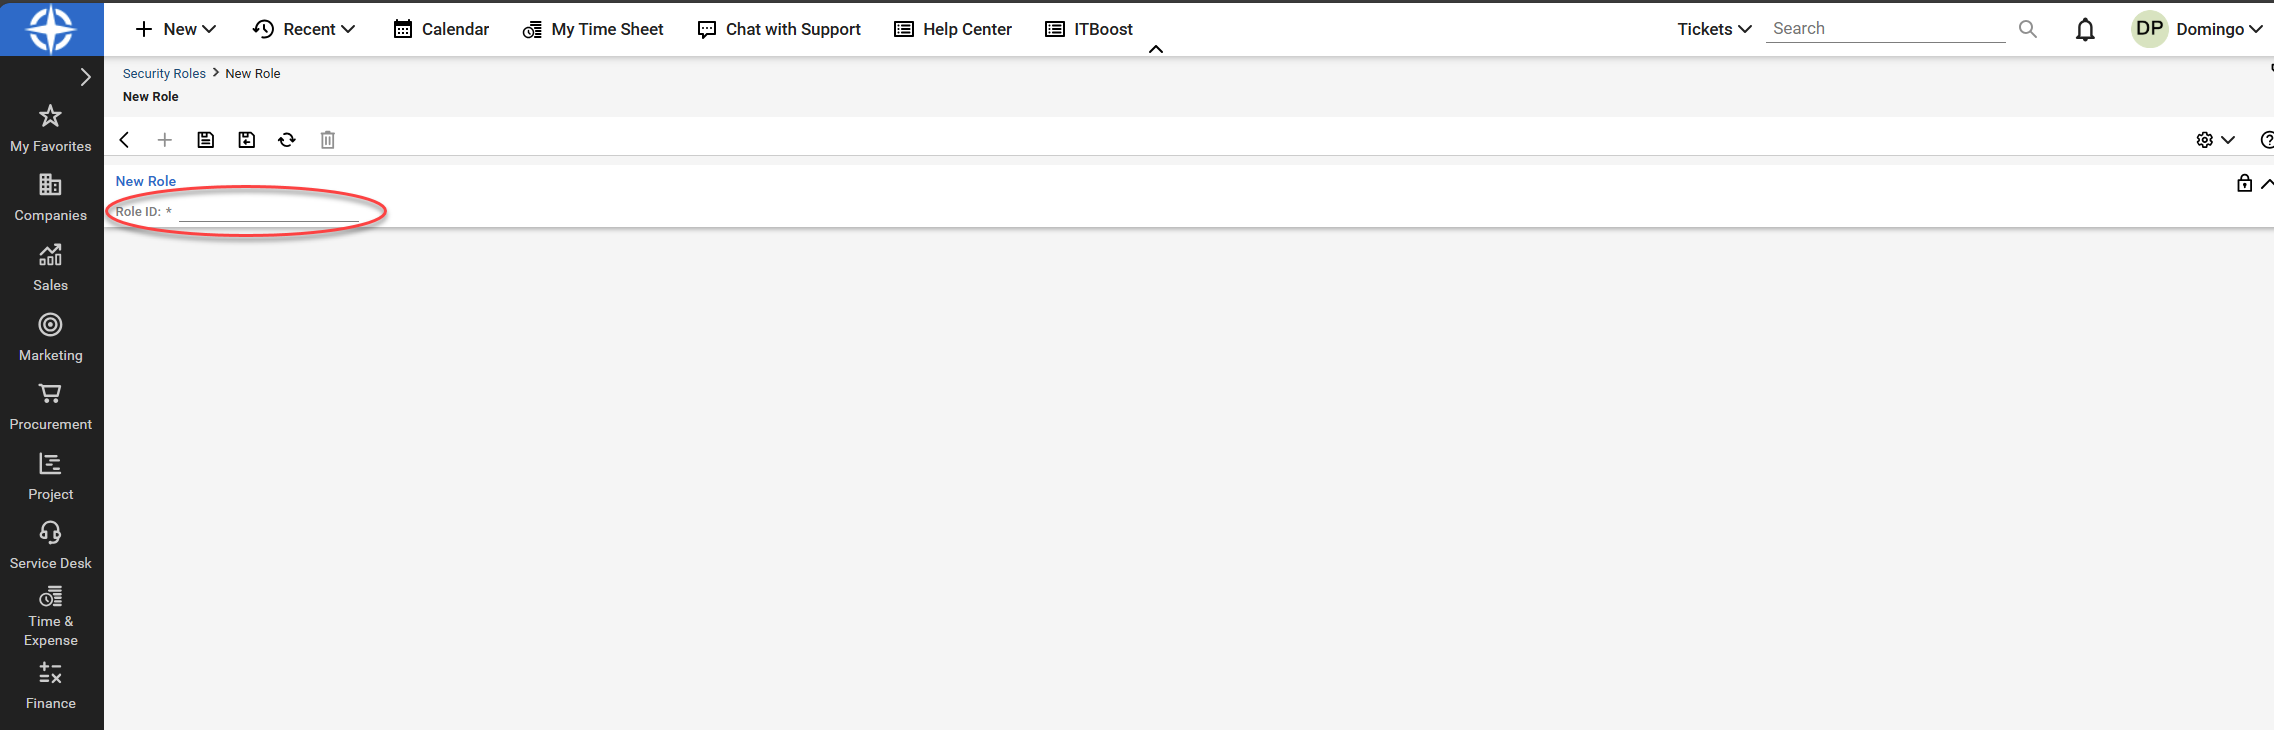
- Enter a name for the new role in the Role ID field.
- Click the save icon.
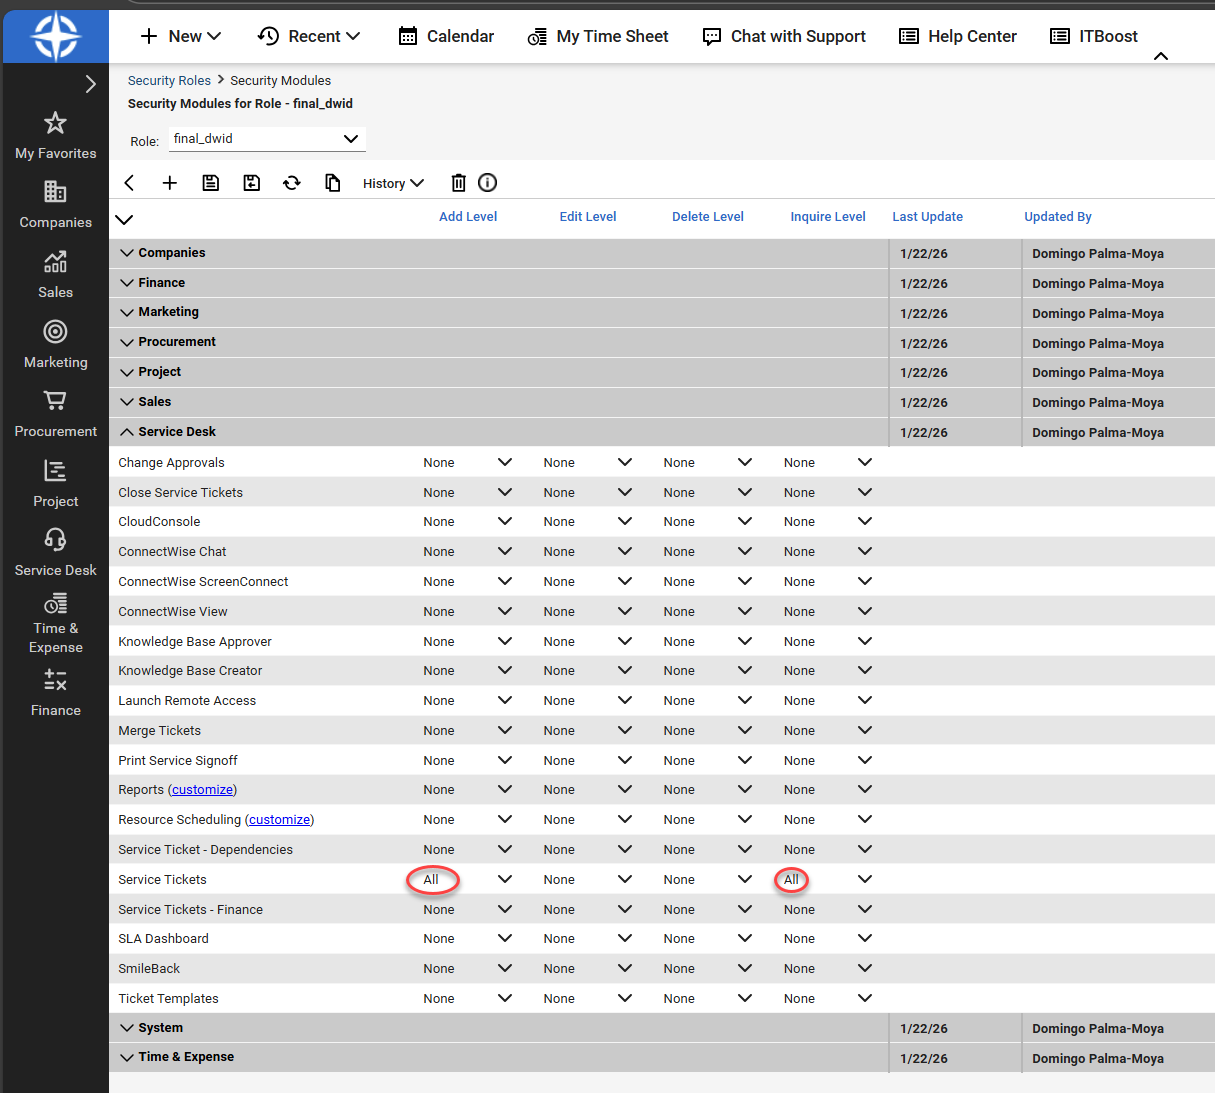
5. Assign the following permissions:
Companies
-
Company Maintenance > Inquire: All

Service Desk
-
Service Tickets > Add Level: All
-
Service Tickets > Inquire: All
System
-
Table Setup > Inquire: All
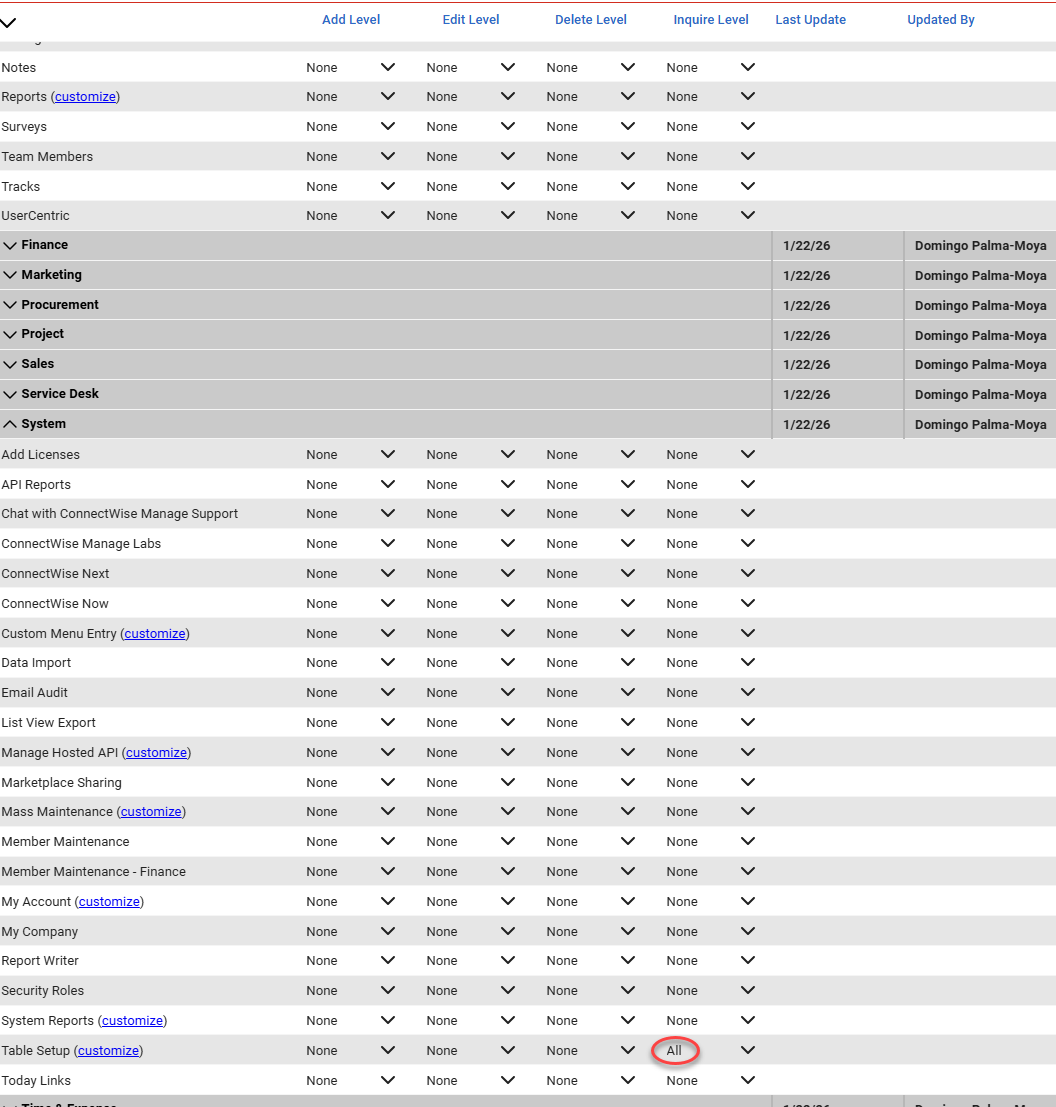
Configure Table Setup allow list
The Table Setup permission includes a customize option that opens the Update Security dialog. This dialog allows you to explicitly define which table categories the role is permitted to access.
When you click customize next to Table Setup, the Update Security window appears with two columns:
-
Allow Access to these (left pane)
-
Disallow Access to these (right pane)
The left pane contains a scrollable, alphabetized list of table categories, such as Company, Service, Agreements, and Activities. These entries represent the tables the role can query or use.
To meet Dark Web ID integration requirements, ensure the following items appear in the Allow Access to these list:
-
Company / Company Status
-
Service / Priority
-
Service / Service Board
-
Service / Source
Use the arrow controls to move them into the Allow Access to these pane.
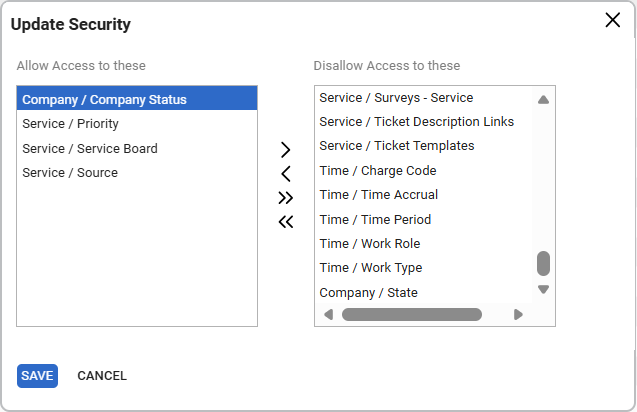
Then, click Save to close the dialog. Click the save icon again to save the role. You will see a confirmation message indicating that the role has been successfully saved.
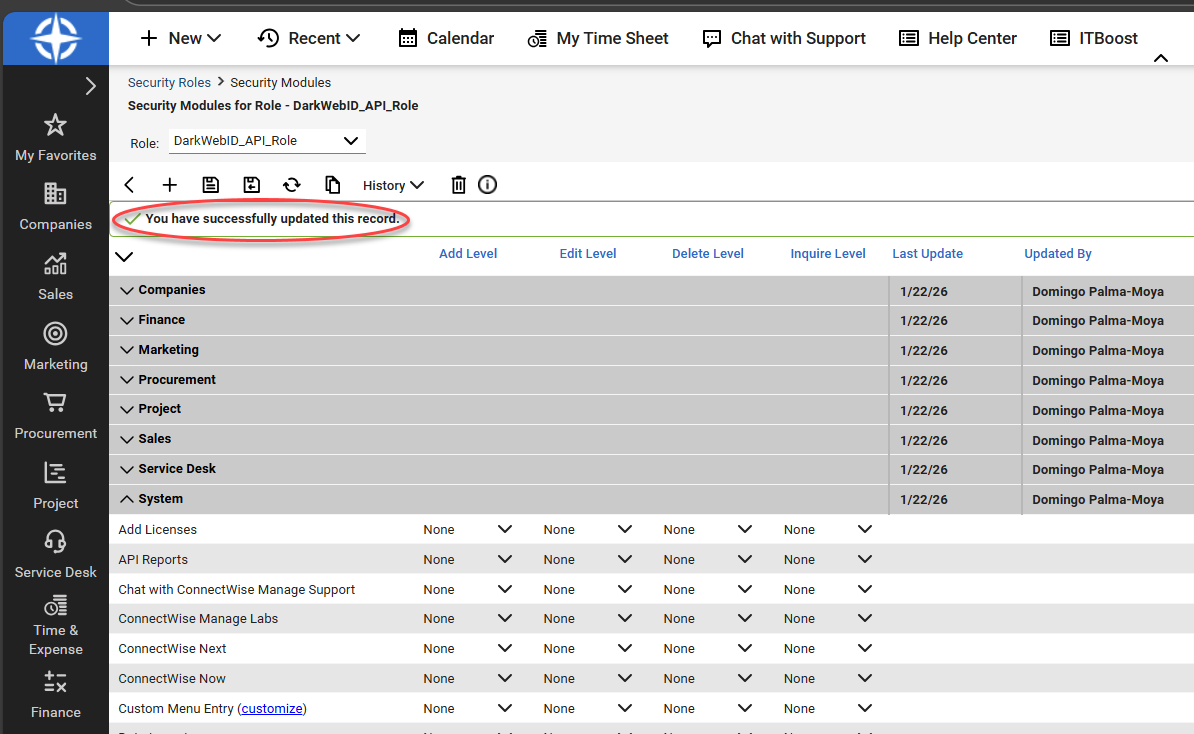
This configuration ensures the API role has the minimum table access required to create and manage service tickets.
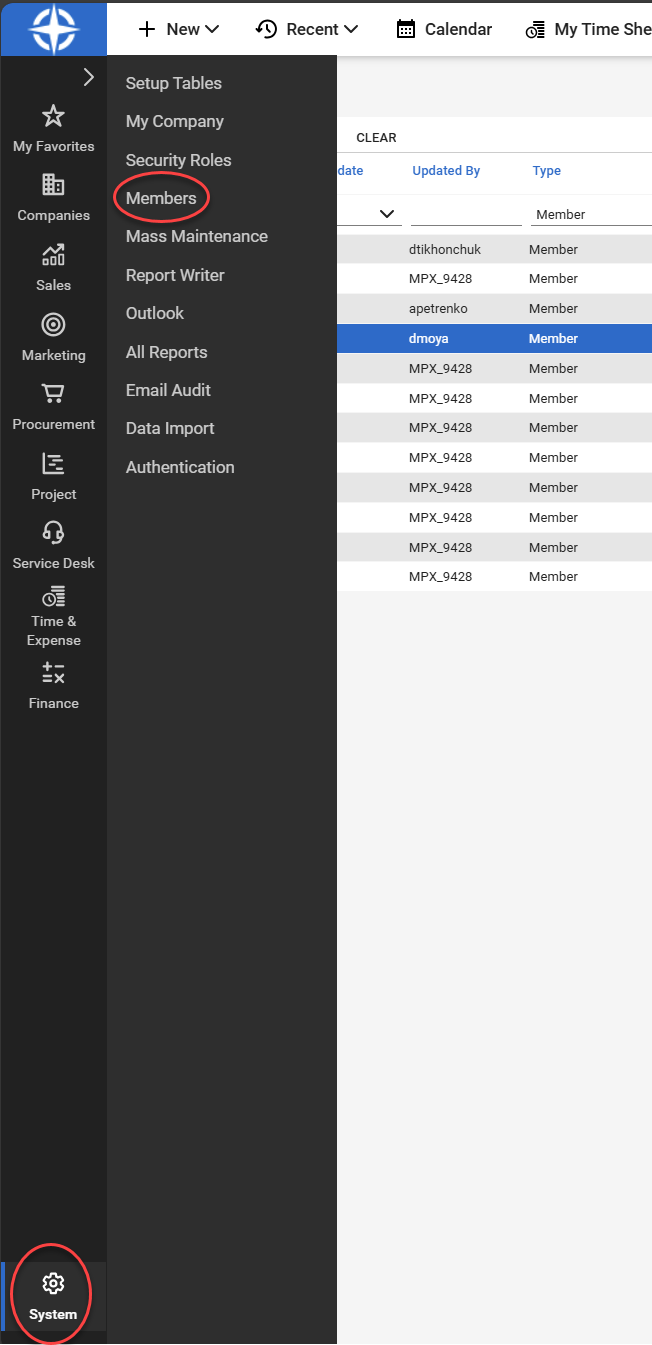
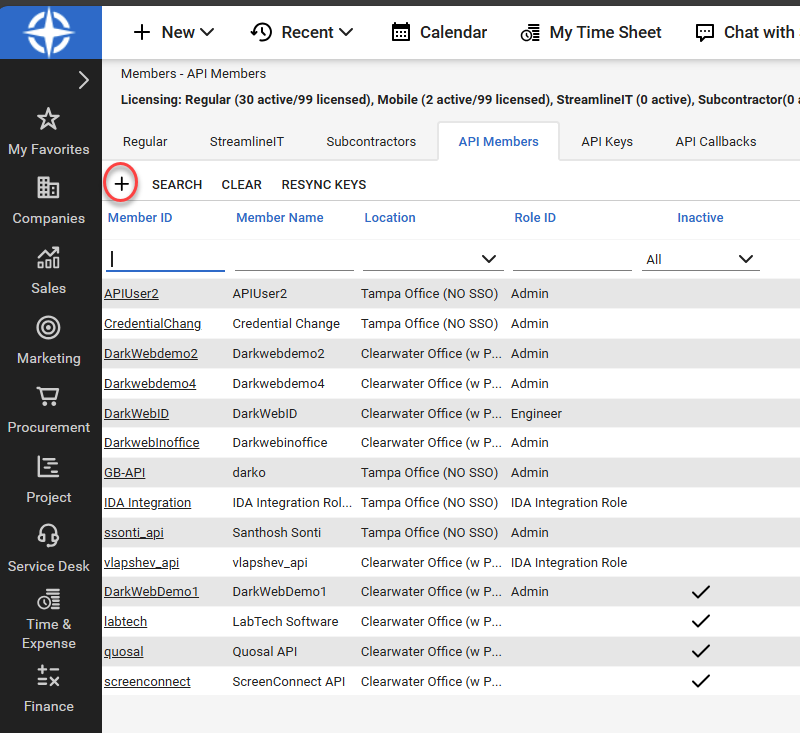
- In ConnectWise PSA, navigate to System > Members.
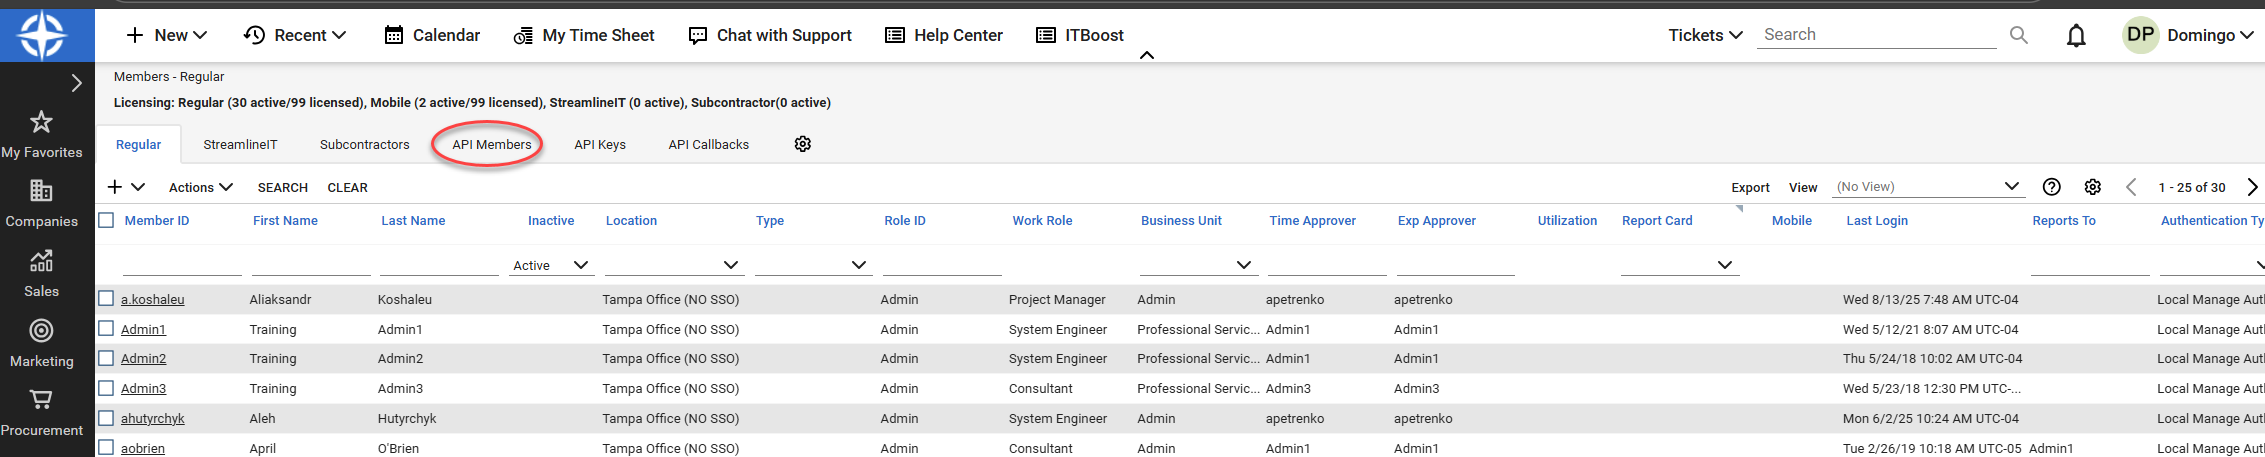
- Navigate to the API Members tab.
- Click the + sign icon to create a new member.
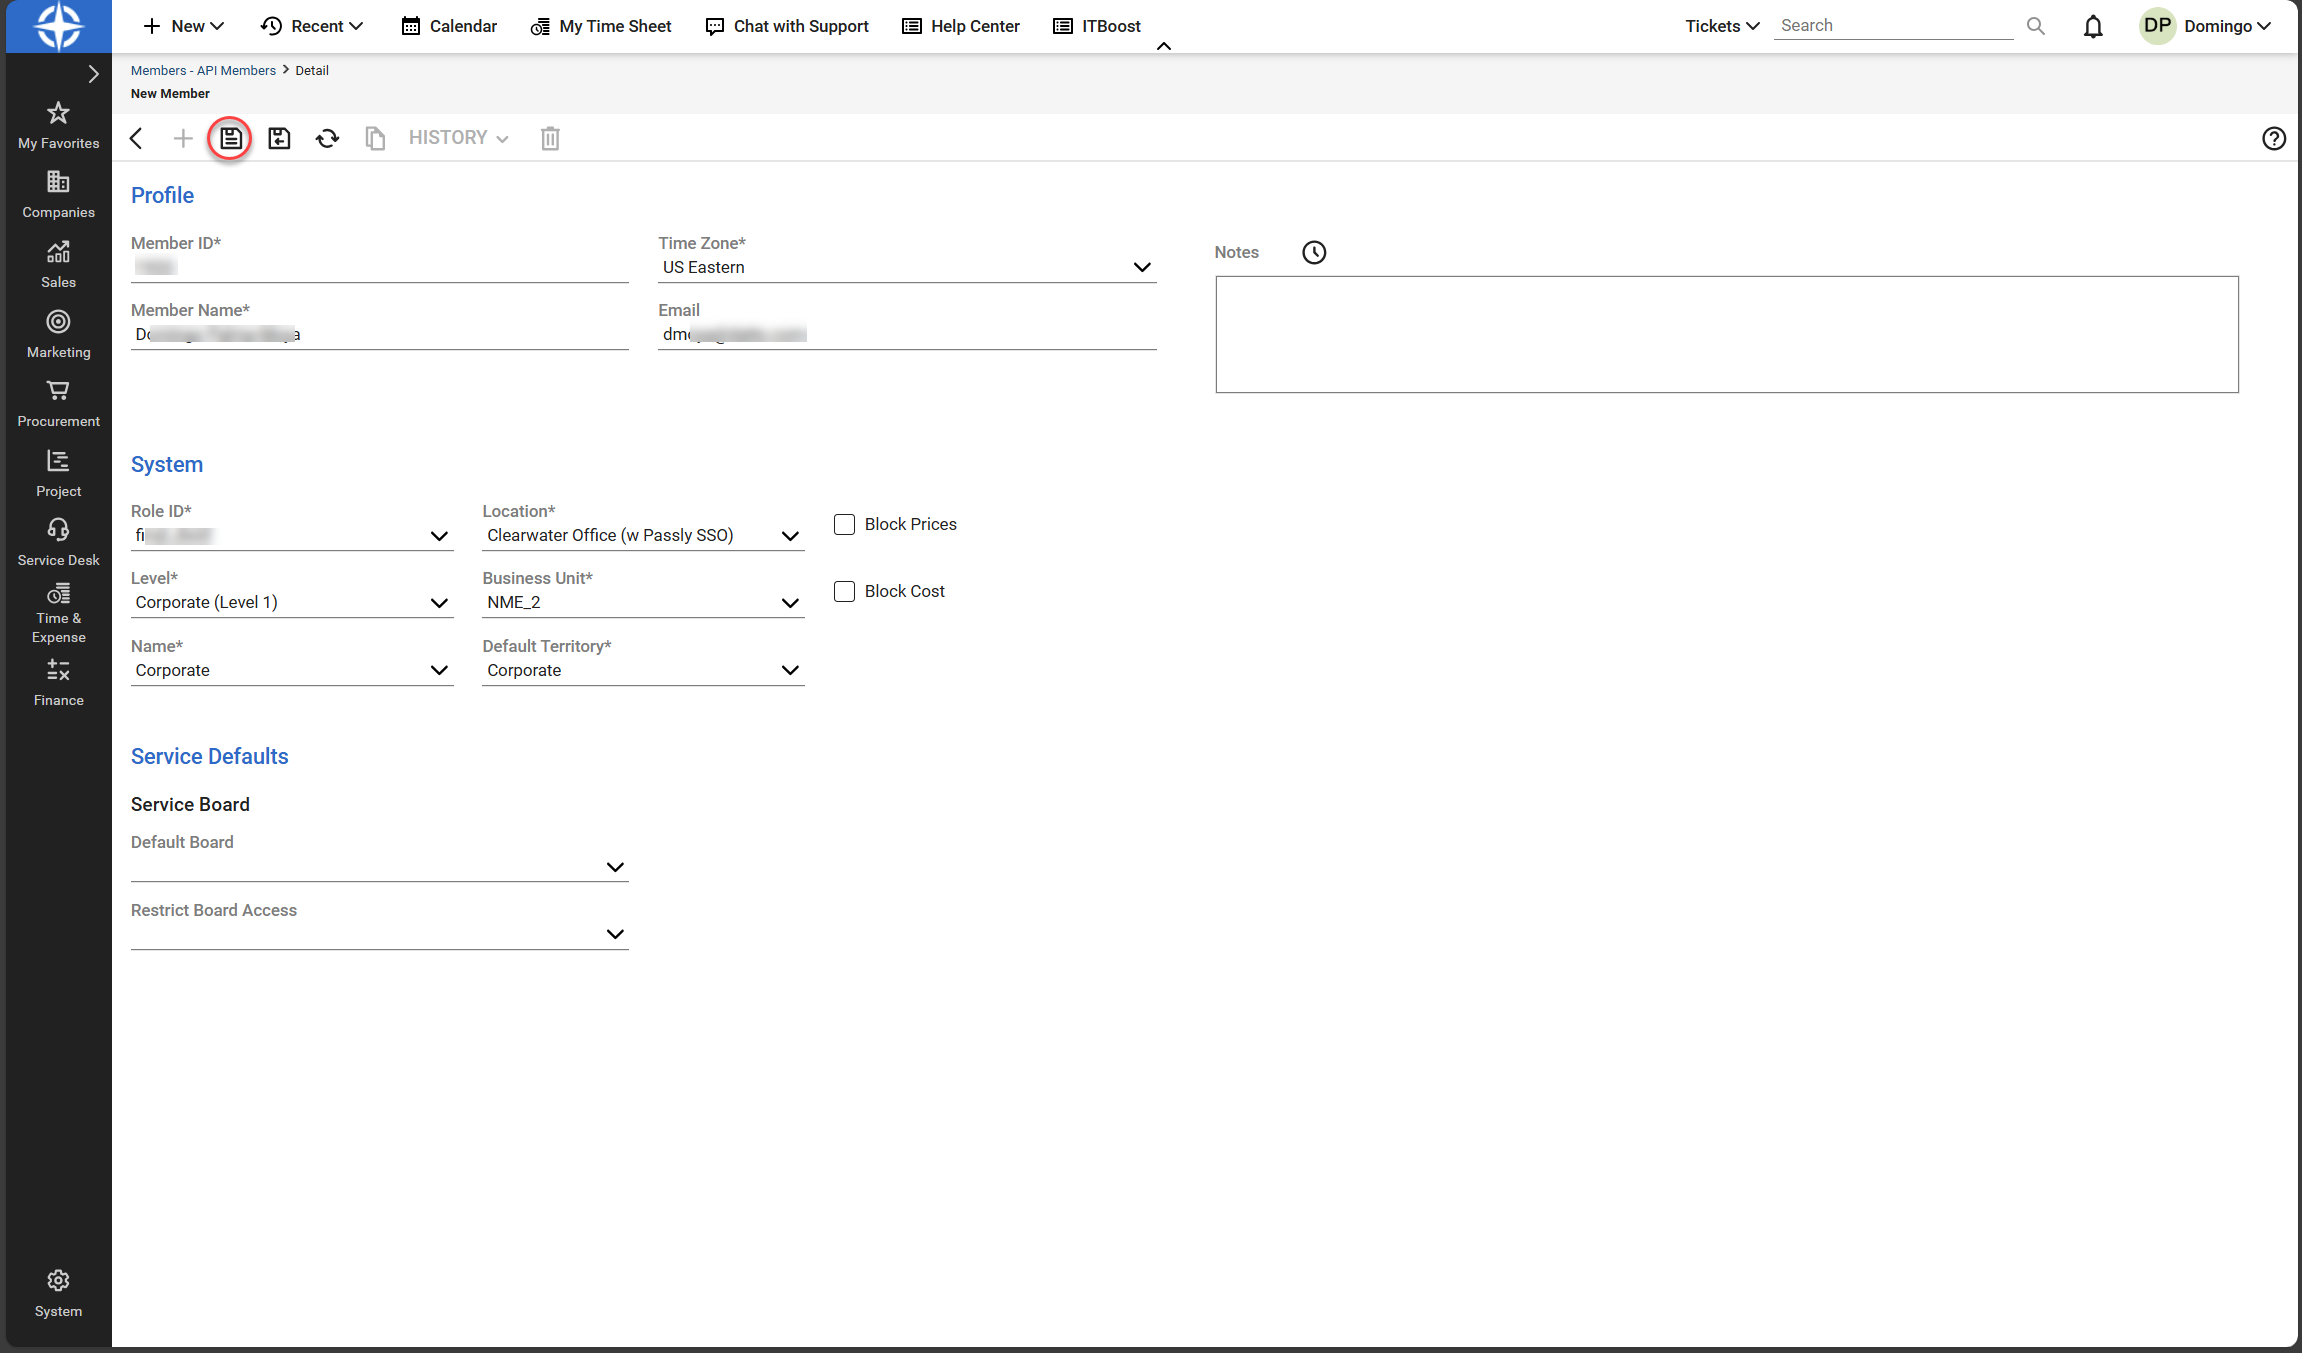
- In the Role ID field under System, select the Security Role created in Configure a security role in ConnectWise PSA.
- Enter the rest of the required details and then click the save icon.
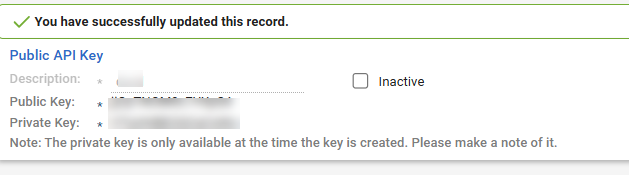
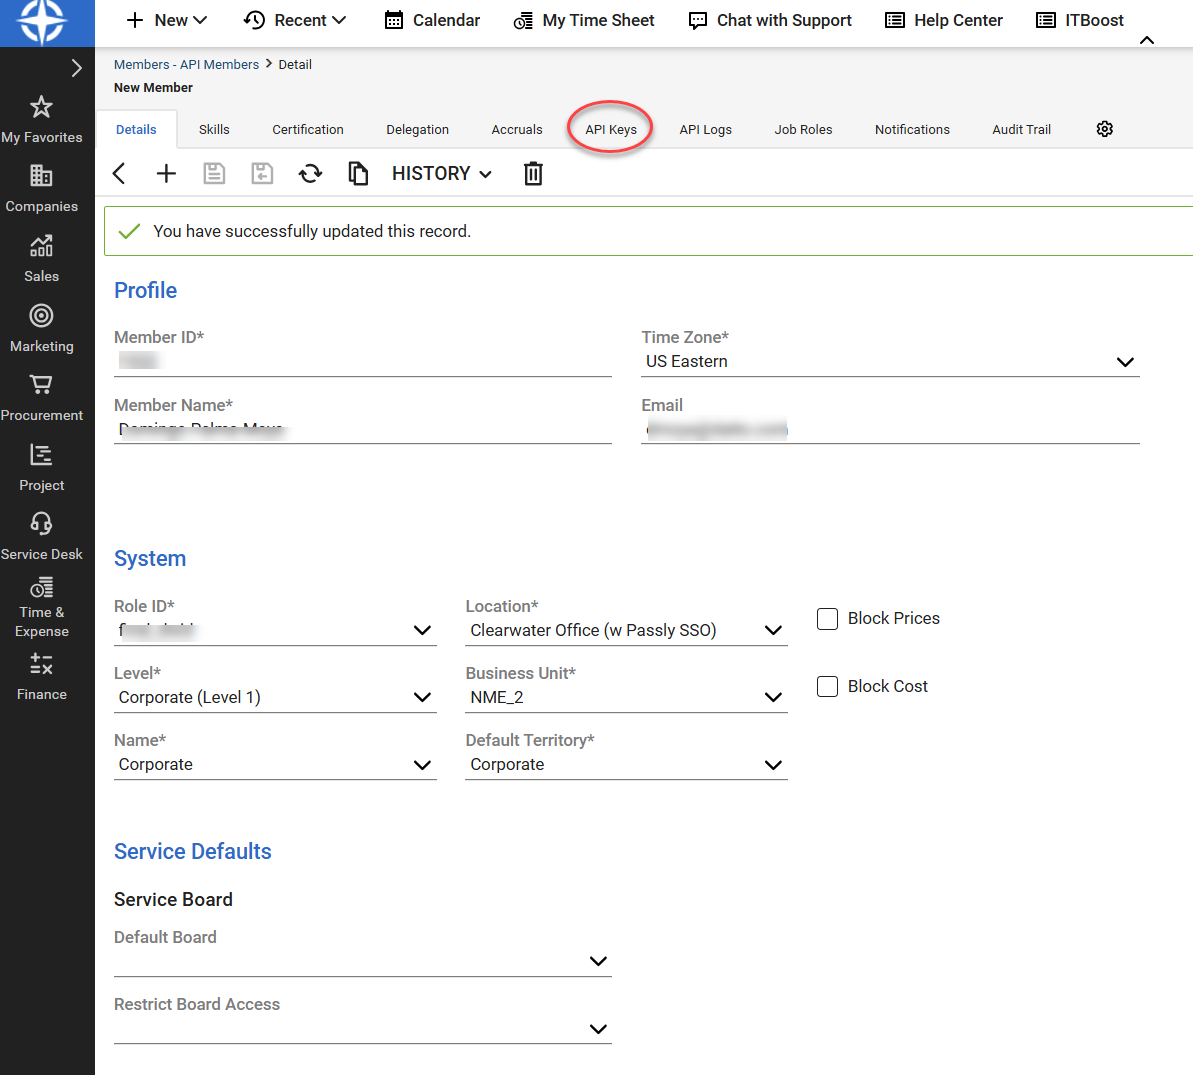
- Navigate to the API Keys tab.
- Click the + sign icon to create new keys.
- Enter a description for your API keys and click the save icon.
- A Public Key and a Private Key are generated. Make note of these keys. After initial creation, the Private Key will no longer be visible.
NOTE Ensure the API Member is assigned the security role created for the Dark Web ID integration. If the account does not have the required permissions, the integration will be unable to query data or create service tickets.
ConnectWise configuration requirements
Before proceeding to enable the integration in Dark Web ID, ensure that the required objects already exist in ConnectWise PSA so service tickets can be created successfully (for example, company records and service boards).
Dark Web ID does not create or manage ConnectWise companies, boards, priorities, or sources. Ensure these objects are configured according to your organization’s ConnectWise standards before enabling the integration.
For general guidance on ConnectWise service boards and how service tickets are structured, refer to the following ConnectWise documentation:
1. Log in to Dark Web ID
2. From the side navigation menu, click Integrations.

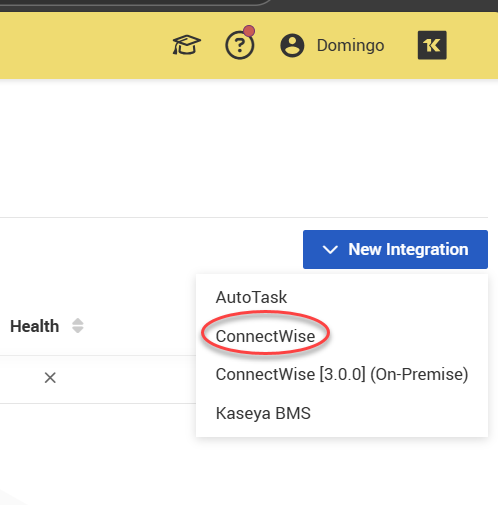
3. Under the PSA tab, click New Integration.
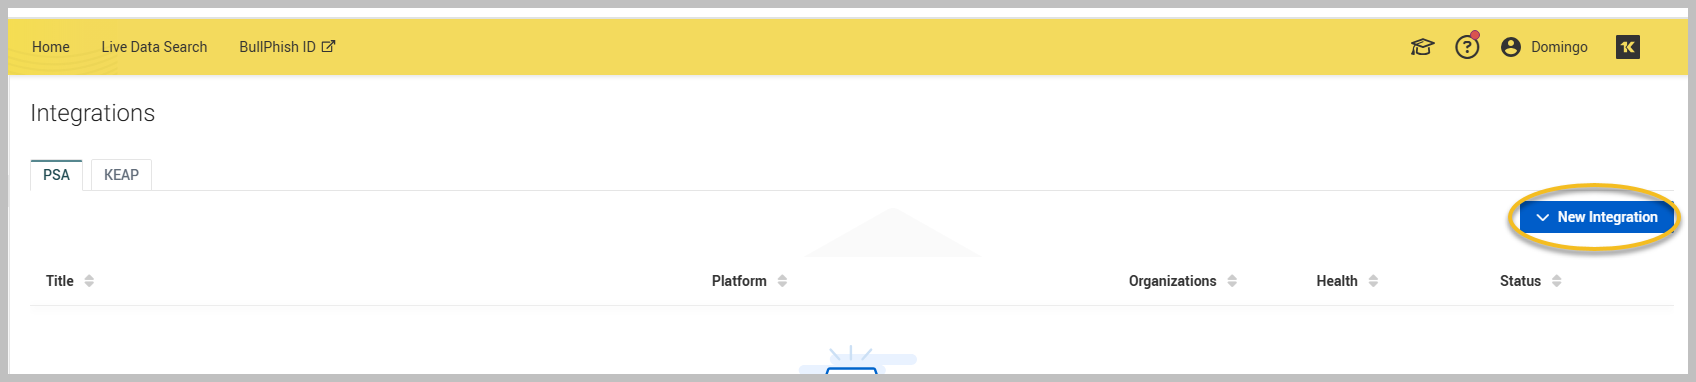
4. Select ConnectWise from the New Integration drop-down menu.
5. On the Create Integration page, enter a name for the integration.
NOTE You can create multiple ConnectWise integrations. Use clear names to distinguish them.
-
Enter the following required information under Credentials:
Field Description Your ConnectWise Manage site The region is selected to identify the data center location from where data is being fetched. Available data centers are in North America, Europe, and Australia. ConnectWise Company ID Your company name that you use to log in to your ConnectWise PSA account. ConnectWise Username Enter the Public Key generated in the Generate API keys in ConnectWise PSA section. ConnectWise Password Enter the Private Key generated in the Generate API keys in ConnectWise PSA section.
NOTE All fields are required in order to complete the integration setup. If your organizations are between multiple managed sites, you must set up separate ConnectWise integrations.
-
Click Save. A success message confirms authentication

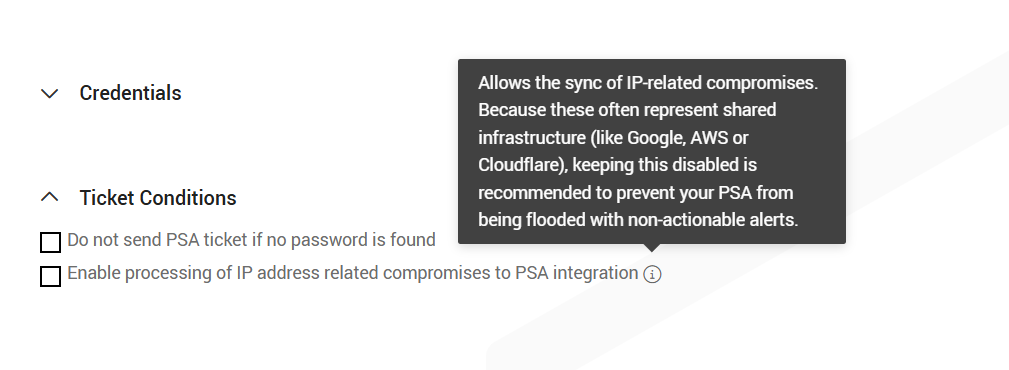
Under Ticket Conditions, you can configure rules that control when ConnectWise tickets are created.
-
Select Do not send PSA ticket if no password is found to prevent ticket creation for compromises that do not include a password. This reduces ticket noise and ensures only that actionable incidents generate ConnectWise tickets.
-
The Enable processing of IP address–related compromises to PSA integration checkbox allows IP address–related compromises to be sent to ConnectWise.
Default behavior:
-
Both ticket conditions are disabled by default. In this state, only email and domain compromises (with or without passwords) are sent to ConnectWise; IP address-related compromises are excluded.
When enabled:
-
IP address–related compromises are also created as ConnectWise tickets.
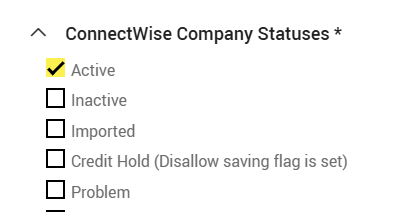
The ConnectWise Company Statuses section lets you choose which ConnectWise company statuses are eligible for ticket creation. Only companies whose status is selected will receive PSA tickets; companies with unselected statuses are excluded. This filter allows you to limit automatic ticket creation to active or supported customers without changing any statuses in ConnectWise.
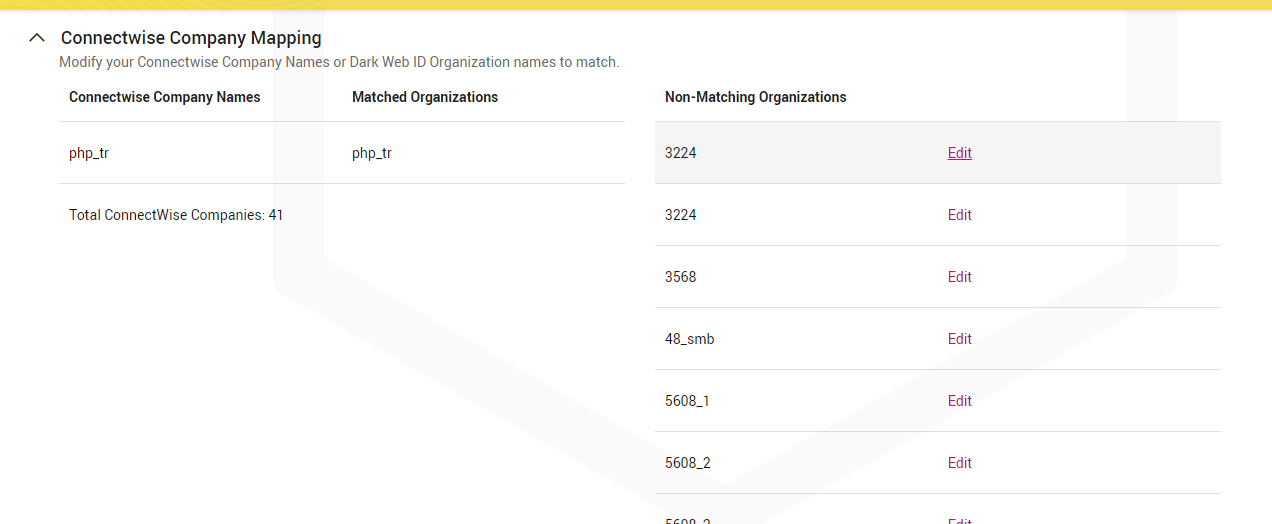
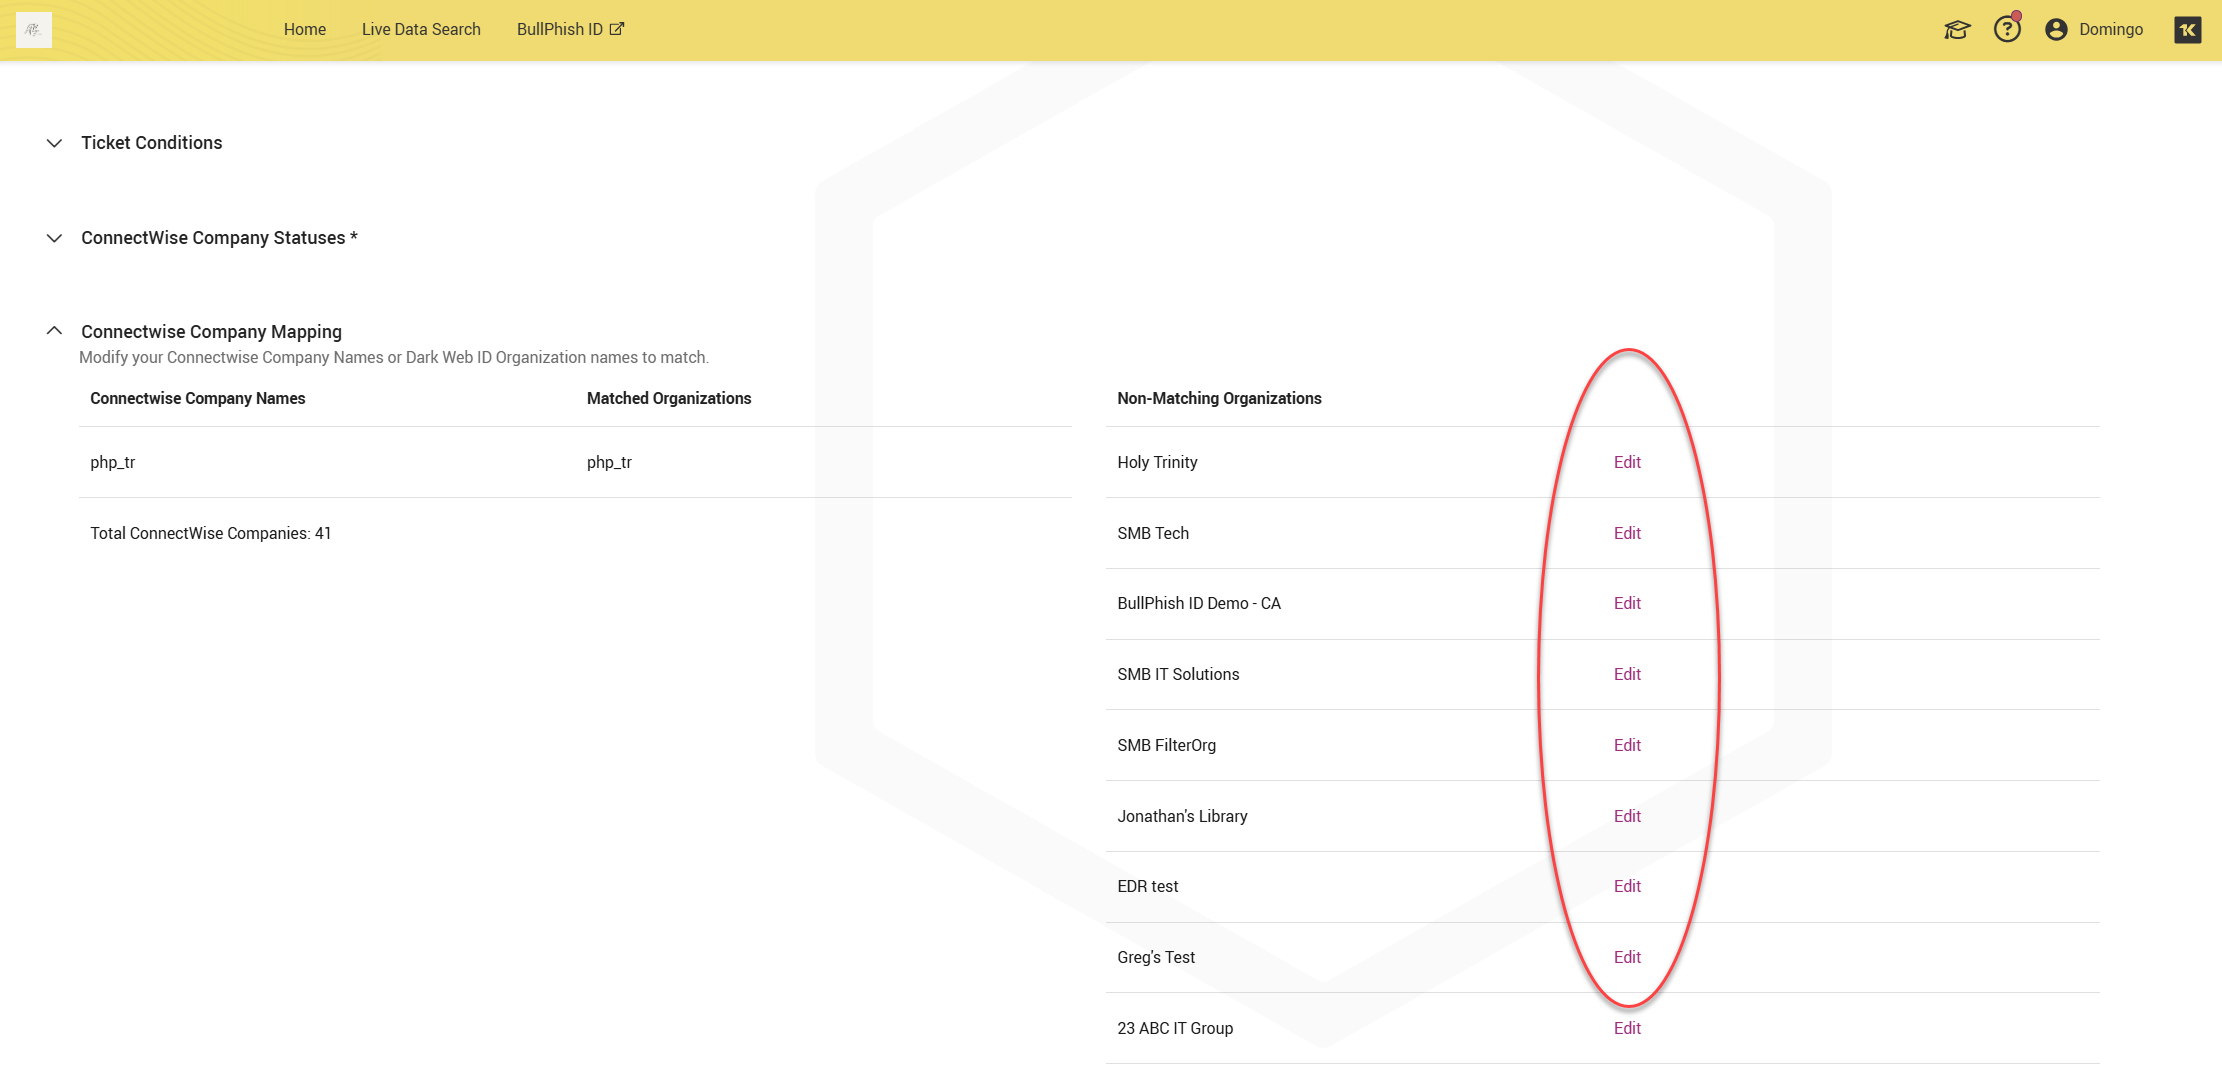
The ConnectWise Company Mapping section allows you to align ConnectWise company names with Dark Web ID organization names so that compromises are sent to the correct company in ConnectWise.
This section displays three columns that help identify and resolve naming mismatches between the two systems:
-
ConnectWise Company Names: Lists companies retrieved from ConnectWise.
-
Matched Organizations: Shows companies that already have a matching Dark Web ID organization name. No action is required for matched entries.
-
Non‑Matching Organizations: Displays ConnectWise companies that do not currently match any Dark Web ID organization.
Resolving non‑matching organizations
For companies listed under Non‑Matching Organizations, click Edit to modify either the ConnectWise company name or the Dark Web ID organization name so they match exactly. Once matched, tickets are created and routed correctly.
Organization matching is case‑sensitive and requires an exact character‑for‑character match between the two systems. Even small differences will prevent a company from being matched.
When resolving non‑matching organizations, verify the following in both ConnectWise and Dark Web ID:
-
Exact spelling
-
Exact capitalization
-
No leading or trailing spaces
Extra whitespace (including trailing spaces at the end of the name) will cause the organization mapping to fail.
NOTE We do not recommend using copy and paste when editing organization names. Copying names between systems can introduce hidden character, non‑breaking spaces, and trailing whitespace that is not visually obvious. Manually typing the organization name in both systems helps prevent these issues and ensures a clean match.
Once the names match exactly, the company will move from Non‑Matching Organizations to Matched Organizations, and tickets will begin routing correctly.
NOTE Tickets are created only for matched companies. If a company is unmapped, no tickets are created—even though it may appear in the Total ConnectWise Companies count, which includes all companies retrieved from ConnectWise regardless of match status. Each Dark Web ID SMB organization can be associated with only one ConnectWise integration.
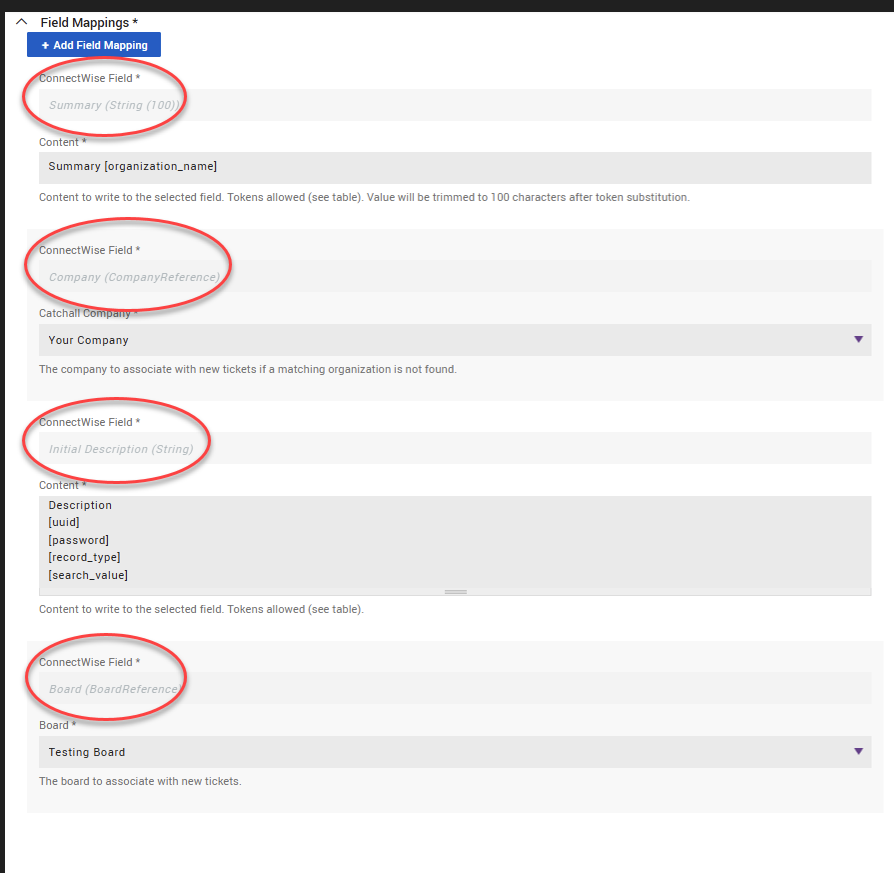
The Field Mappings section defines how Dark Web ID compromise data is written into specific ConnectWise service ticket fields when a PSA ticket is created. In this section, you can map ConnectWise ticket fields to Dark Web ID tokens, which dynamically populate ticket content with relevant compromise details.
Adding a field mapping
Click + Add Field Mapping to create a new mapping. Each mapping requires:
-
ConnectWise Field: The ConnectWise service ticket field to populate
-
Content: Enter static text, Dark Web ID tokens, or a combination of both. Tokens are replaced with real compromise data at ticket creation time.
NOTE Content values may be trimmed to the maximum character length supported by the selected ConnectWise field.
Required field mappings
Four required field mappings are provided by default to support ConnectWise ticket creation. These mappings correspond to core ConnectWise service ticket fields and must remain configured for the integration to function correctly.
-
Summary: Provides a short, readable description of the compromise.
-
Company: Determines which ConnectWise company the ticket is associated with.
-
Initial Description: Contains detailed compromise information written to the ticket body.
-
Board: Specifies the ConnectWise service board where new tickets are created.
These required mappings are pre-configured and visible in the Field Mappings section.
After the required mappings are in place, you can add additional field mappings as needed to customize ticket content.
IMPORTANT Incorrect or missing mappings can cause ticket creation to fail, and changes take effect immediately after you save them.
Catchall Company mapping
The Catchall Company mapping applies to the required Company field and defines which ConnectWise company is used when a matching Dark Web ID organization cannot be found.
If no organization match exists:
-
The service ticket is still created.
-
The selected Catchall Company is assigned to the ticket.
This ensures compromises are not dropped due to unmatched organization names.
Using tokens
The Token table on the right side of the page lists all available Dark Web ID tokens and their descriptions. These tokens can be inserted into the Content field to dynamically populate tickets.
Tokens appear in square brackets (for example, [organization_name]) and are replaced with real data when the ticket is generated.
2.png)
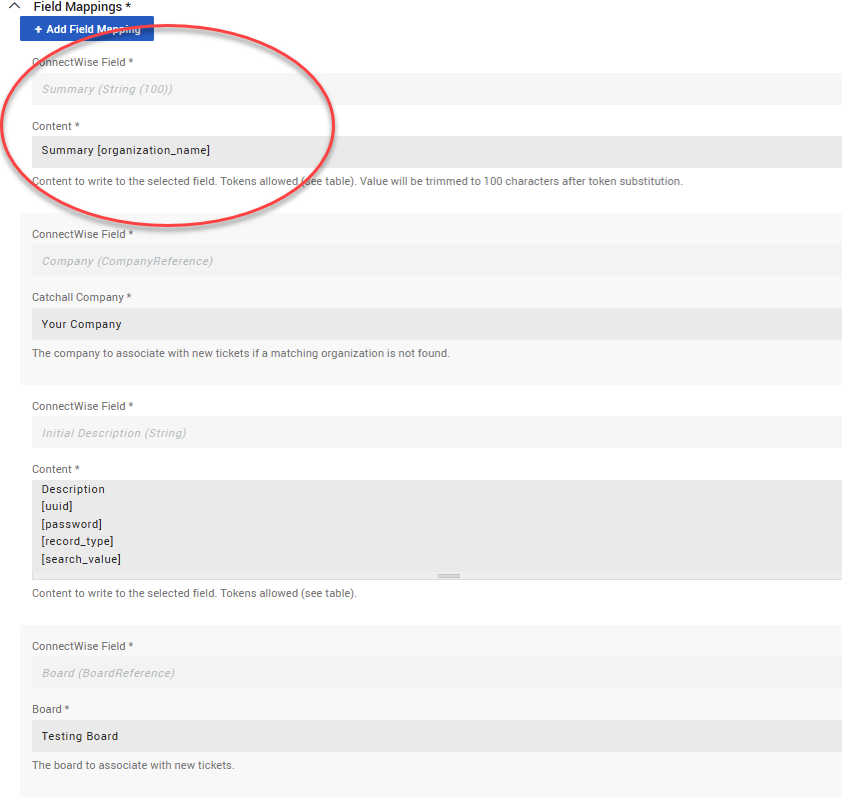
Example: Summary field mapping
In the screenshot, the Summary (String 100) field is mapped with the following content: Summary [organization_name].
How this works:
-
Summary is static text you entered.
-
[organization_name] is a Dark Web ID token.
-
When a ticket is created, [organization_name] is automatically replaced with the name of the Dark Web ID organization associated with the compromise.
This ensures each ticket summary clearly identifies the affected organization without requiring manual updates.
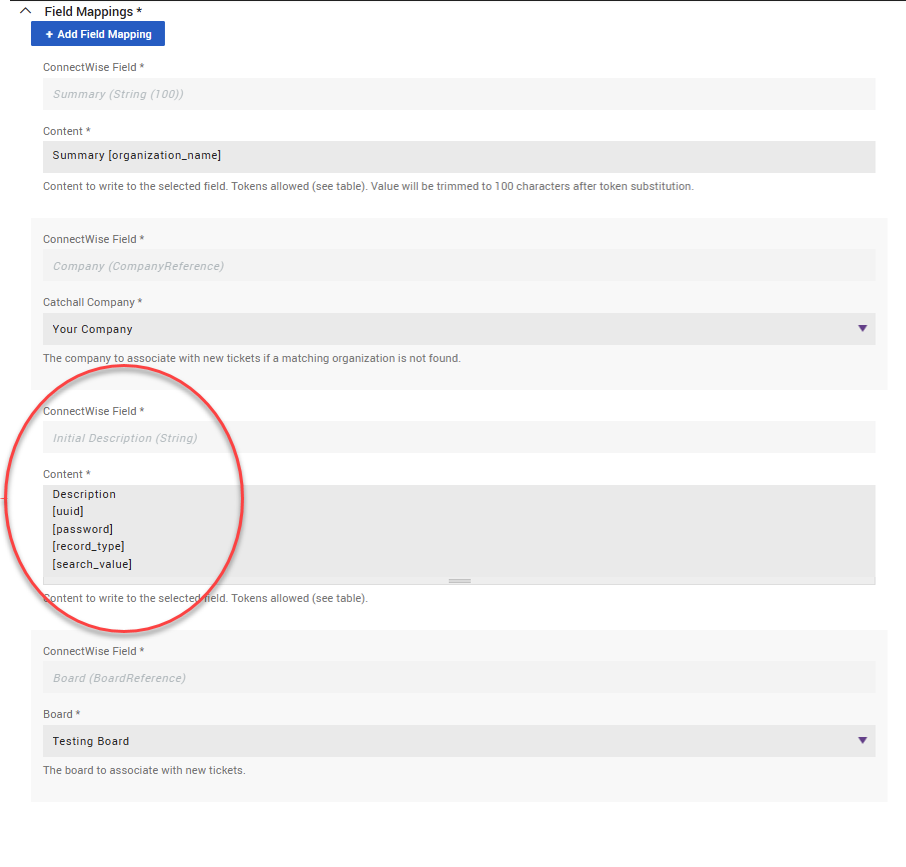
Example: Initial Description field mapping
The Initial Description (String) field in the screenshot demonstrates how multiple tokens can be combined to create a structured ticket description:
Description
[uuid]
[password]
[record_type]
[search_value]
When a ticket is created:
-
[uuid] is replaced with the unique compromise ID
-
[password] is replaced with the compromised password (if applicable)
-
[record_type] identifies whether the record is an Email, Domain, or IP
-
[search_value] contains the affected email address or IP
Each token resolves to its actual value at ticket creation time, producing a readable incident description for technicians in ConnectWise.
NOTE You can add static labels (for example, Record type: or Affected value:) to make the ticket description easier to read.
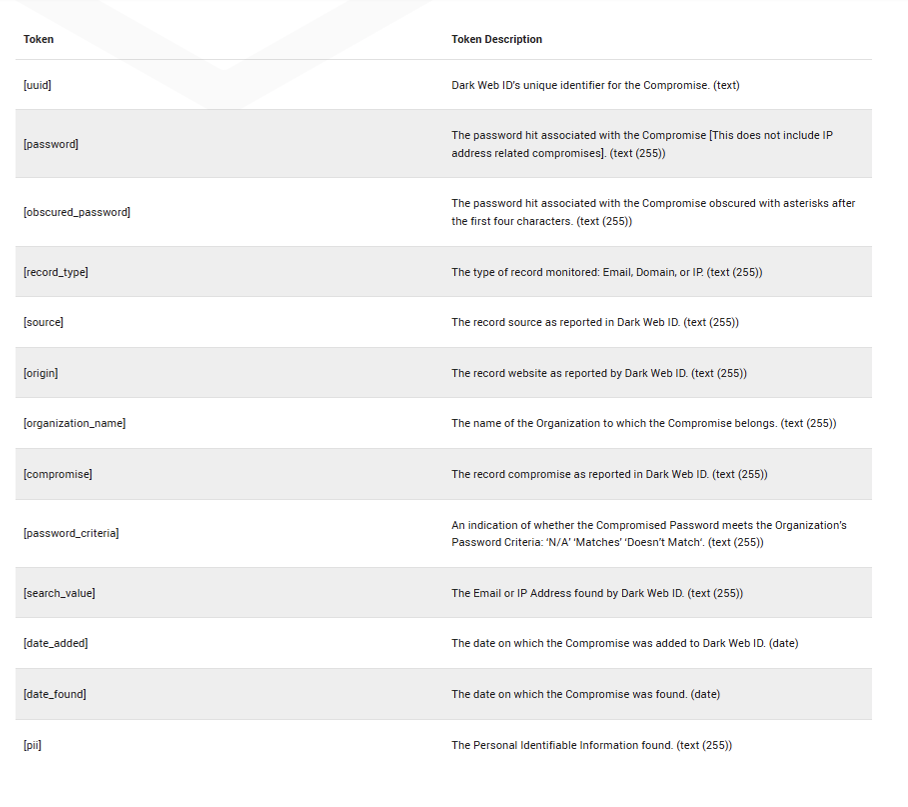
Where available tokens come from
The Token and Token Description columns on the right side of the page show all available Dark Web ID tokens and explain what each one represents. You can reference this list at any time while building field mappings.
-
[uuid]: Dark Web ID's unique identifier for the compromise. (text)
-
[password]: The password hit associated with the Compromise [This does not include IP address related compromises]. (text (255))
-
[obscured_password]: The password hit associated with the Compromise obscured with asterisks after the first four characters. (text (255))
-
[record_type]: The type of record monitored: Email, Domain, or IP. (text (255))
-
[source]: The record source as reported in Dark Web ID. (text (255))
-
[origin]: The record website as reported by Dark Web ID. (text (255))
-
[organization_name]: The name of the Organization to which the Compromise belongs. (text (255))
-
[compromise]: The record compromise as reported in Dark Web ID. (text (255))
-
[password_criteria]: An indication of whether the Compromised Password meets the Organization’s Password Criteria: ‘N/A’ ‘Matches’ ‘Doesn’t Match‘. (text (255))
-
[search_value]: The Email or IP Address found by Dark Web ID. (text (255))
-
[date_added]: The date on which the Compromise was added to Dark Web ID. (date)
-
[date_found]: The date on which the Compromise was found. (date)
-
[pii]: The Personal Identifiable Information found. (text (255))
Character limits
Each ConnectWise field has a maximum character limit (shown next to the field name). After token substitution, content is automatically trimmed to fit the field’s limit. If the content exceeds the limit, text at the end of the field is truncated.
Key takeaways
-
Tokens are placeholders replaced with live compromise data at ticket creation time.
-
You can combine static text + tokens in any supported field.
-
The Token table on the right side of the screen is your reference for available values.
To save and test the integration, click Save or Save And Submit A Test Compromise in the lower-right corner of the page to validate your configuration.

A test ticket will be created in ConnectWise using sample data. If the test is successful, you will see the following confirmation message:
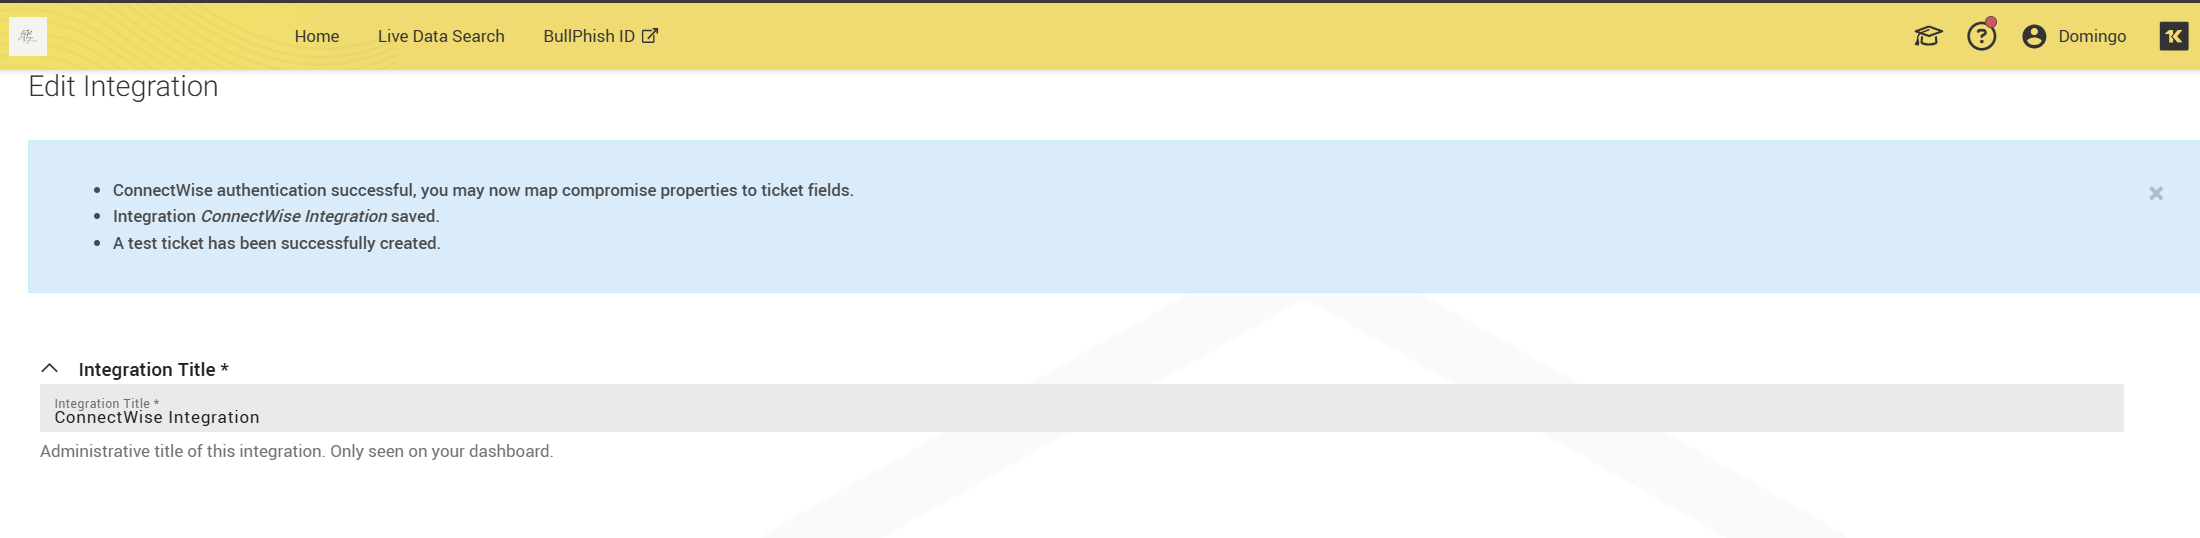
If you encounter any errors, please review the field mappings and permissions. For further assistance, contact support@idagent.com.
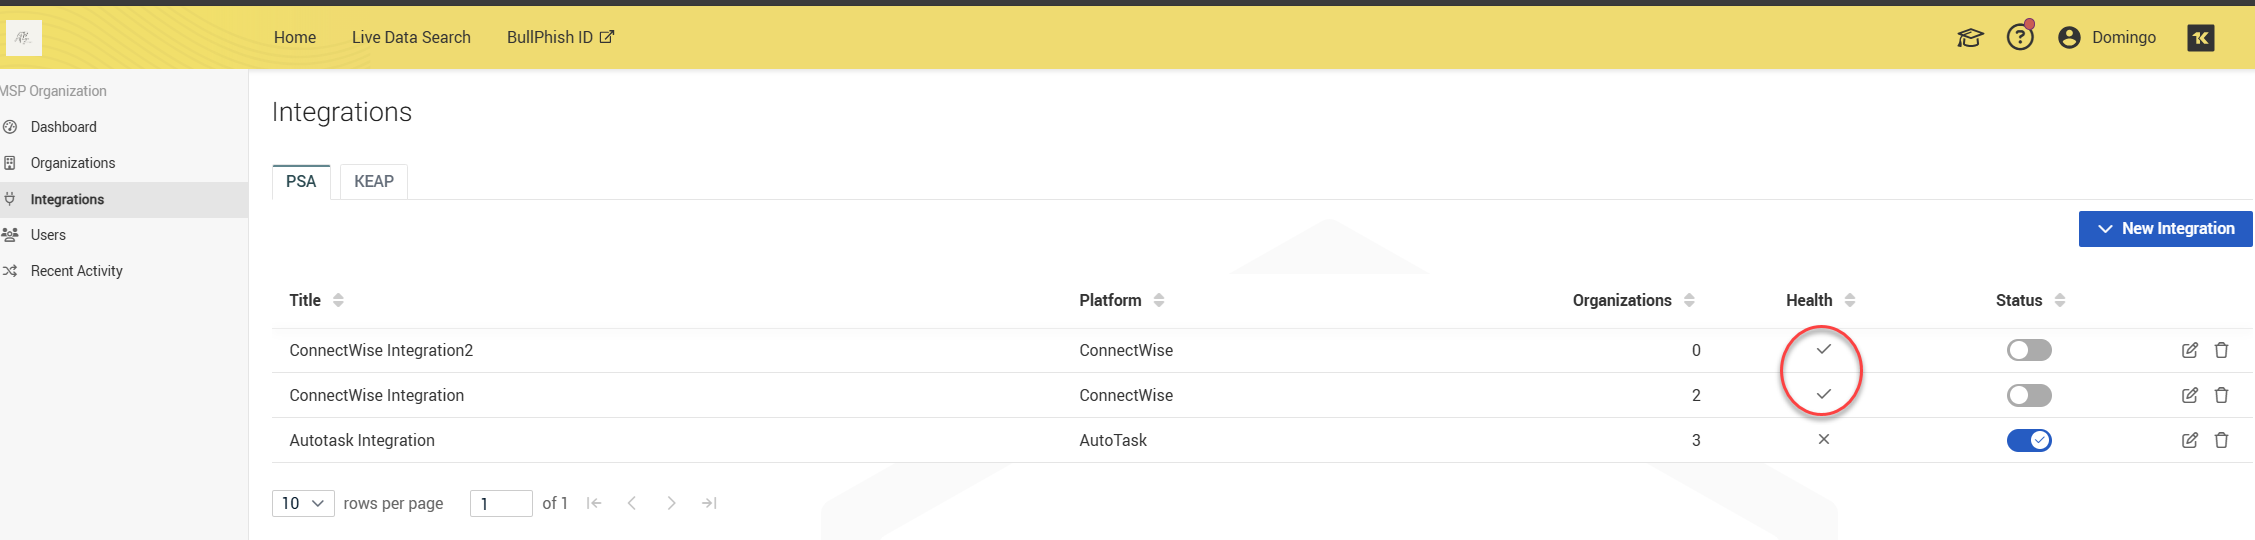
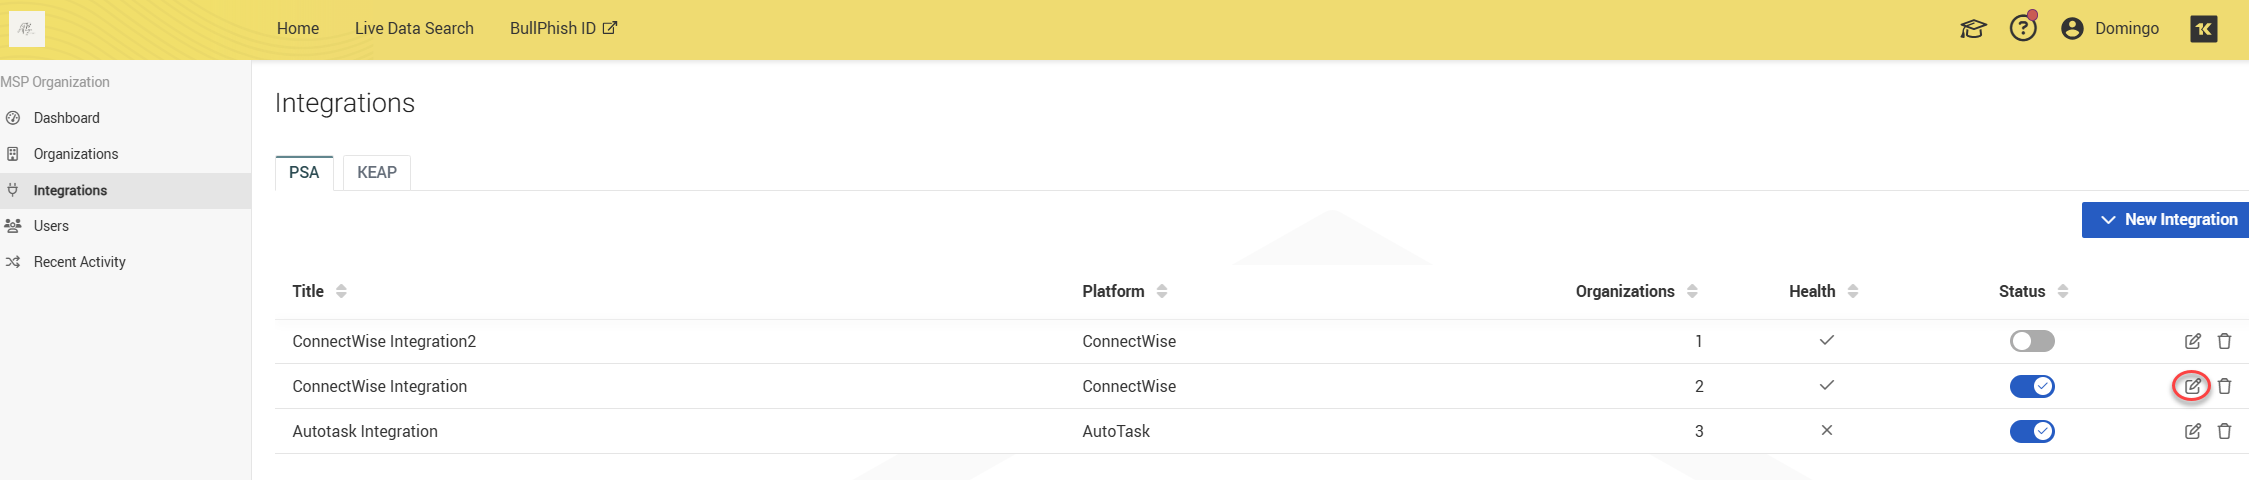
Each integration displays a health status:
-
Healthy (✓): This indicates that your most recent integration request was successful.
-
Unhealthy (✗): This indicates that your most recent integration request was unsuccessful or encountered an error. This status will remain until a successful integration request is completed.
NOTE Integration is marked unhealthy after the fifth unsuccessful consecutive attempt. The errors will be shown on the Edit Integration screen.
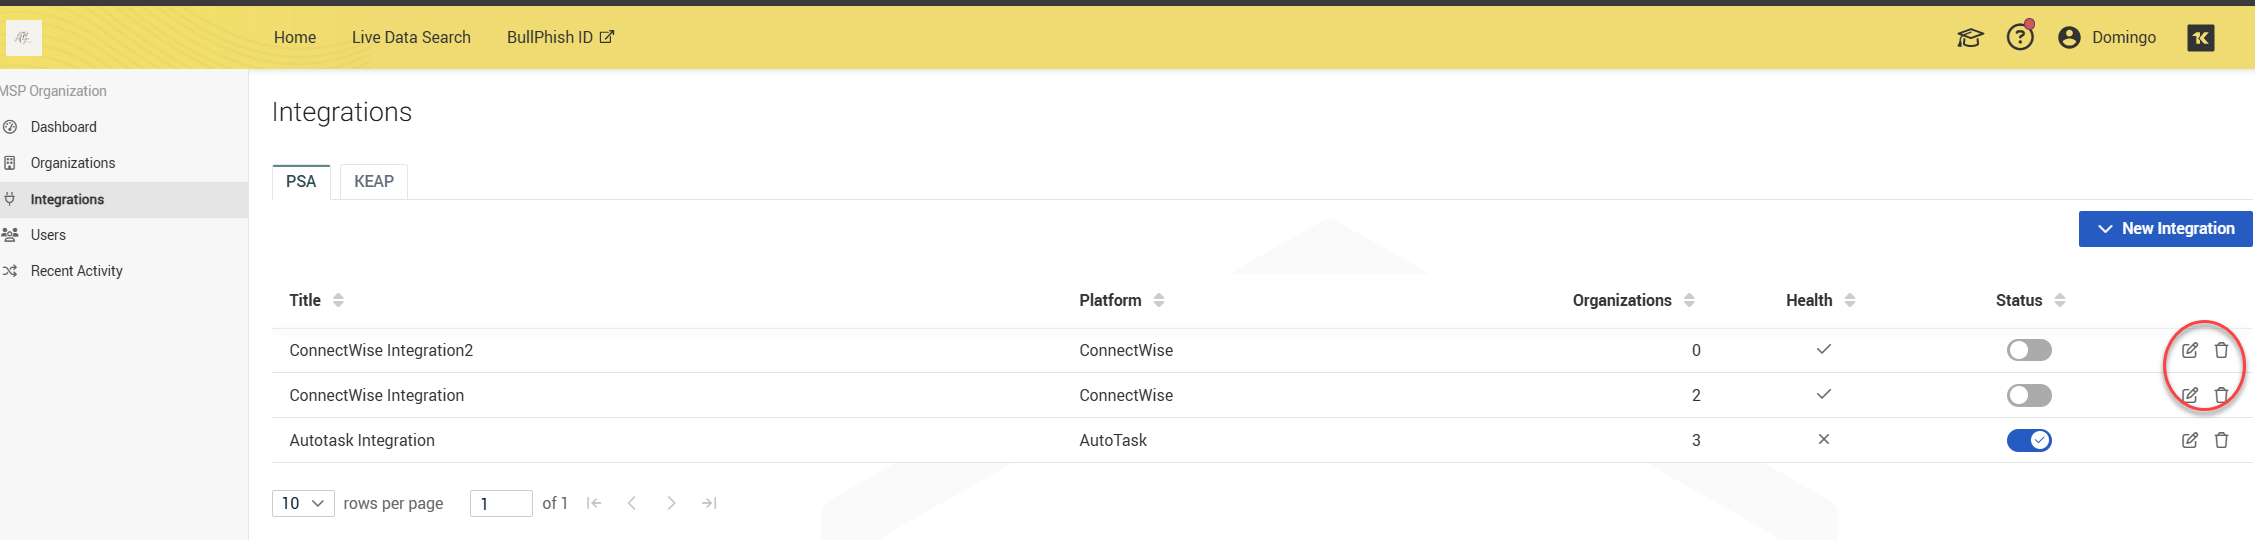
You can edit the integration using the edit icon, and the delete icon will completely delete your integration.
-
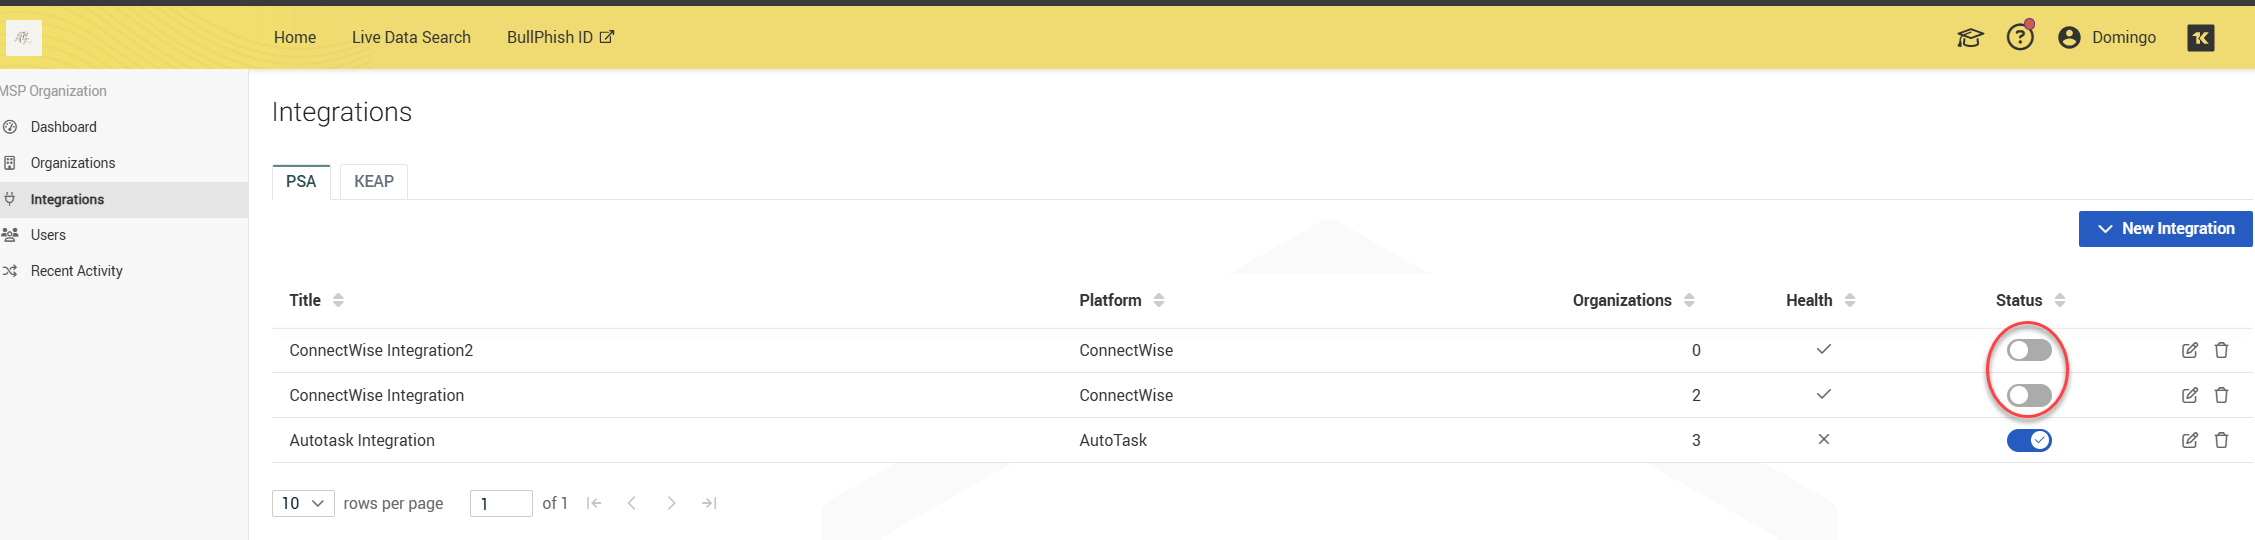
Integrations are disabled by default. You can enable your integration using the toggle button.
-
After clicking the toggle, you will be prompted to enable the integration. Click Enable to activate the ConnectWise integration.

- int
Enabling the integration globally is not sufficient—you must also enable it per SMB.
There are two ways to edit an organization and manage its integrations:
-
From the Organizations page
-
From the Integrations page
Both methods are supported.
Enable an integration from the Organizations page
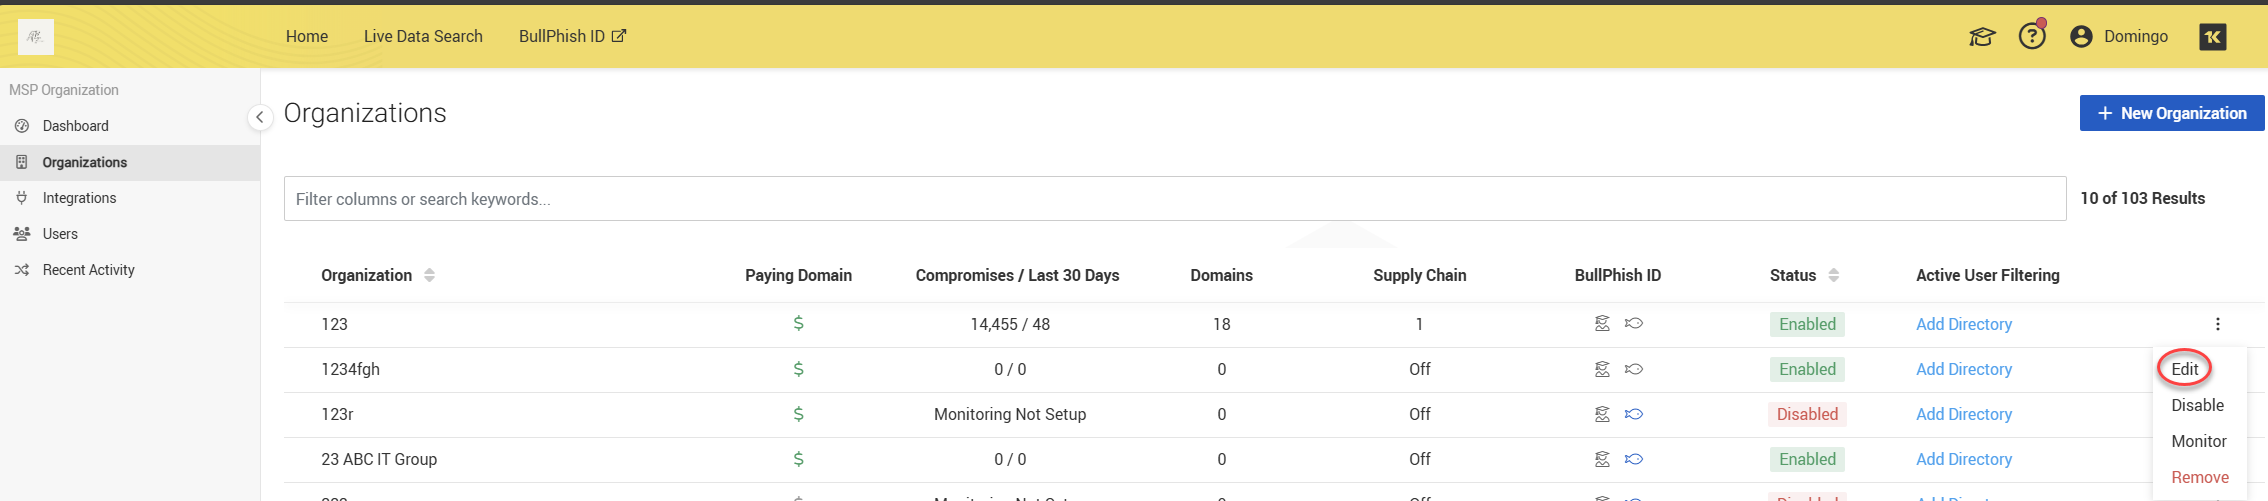
1. Open the Organizations page from the side navigation menu.
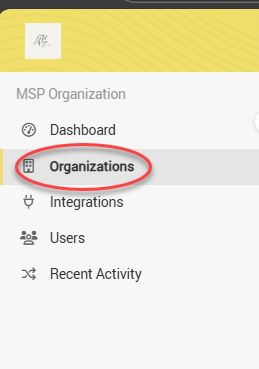
2. Open the organization’s actions menu (three dots) and select Edit.
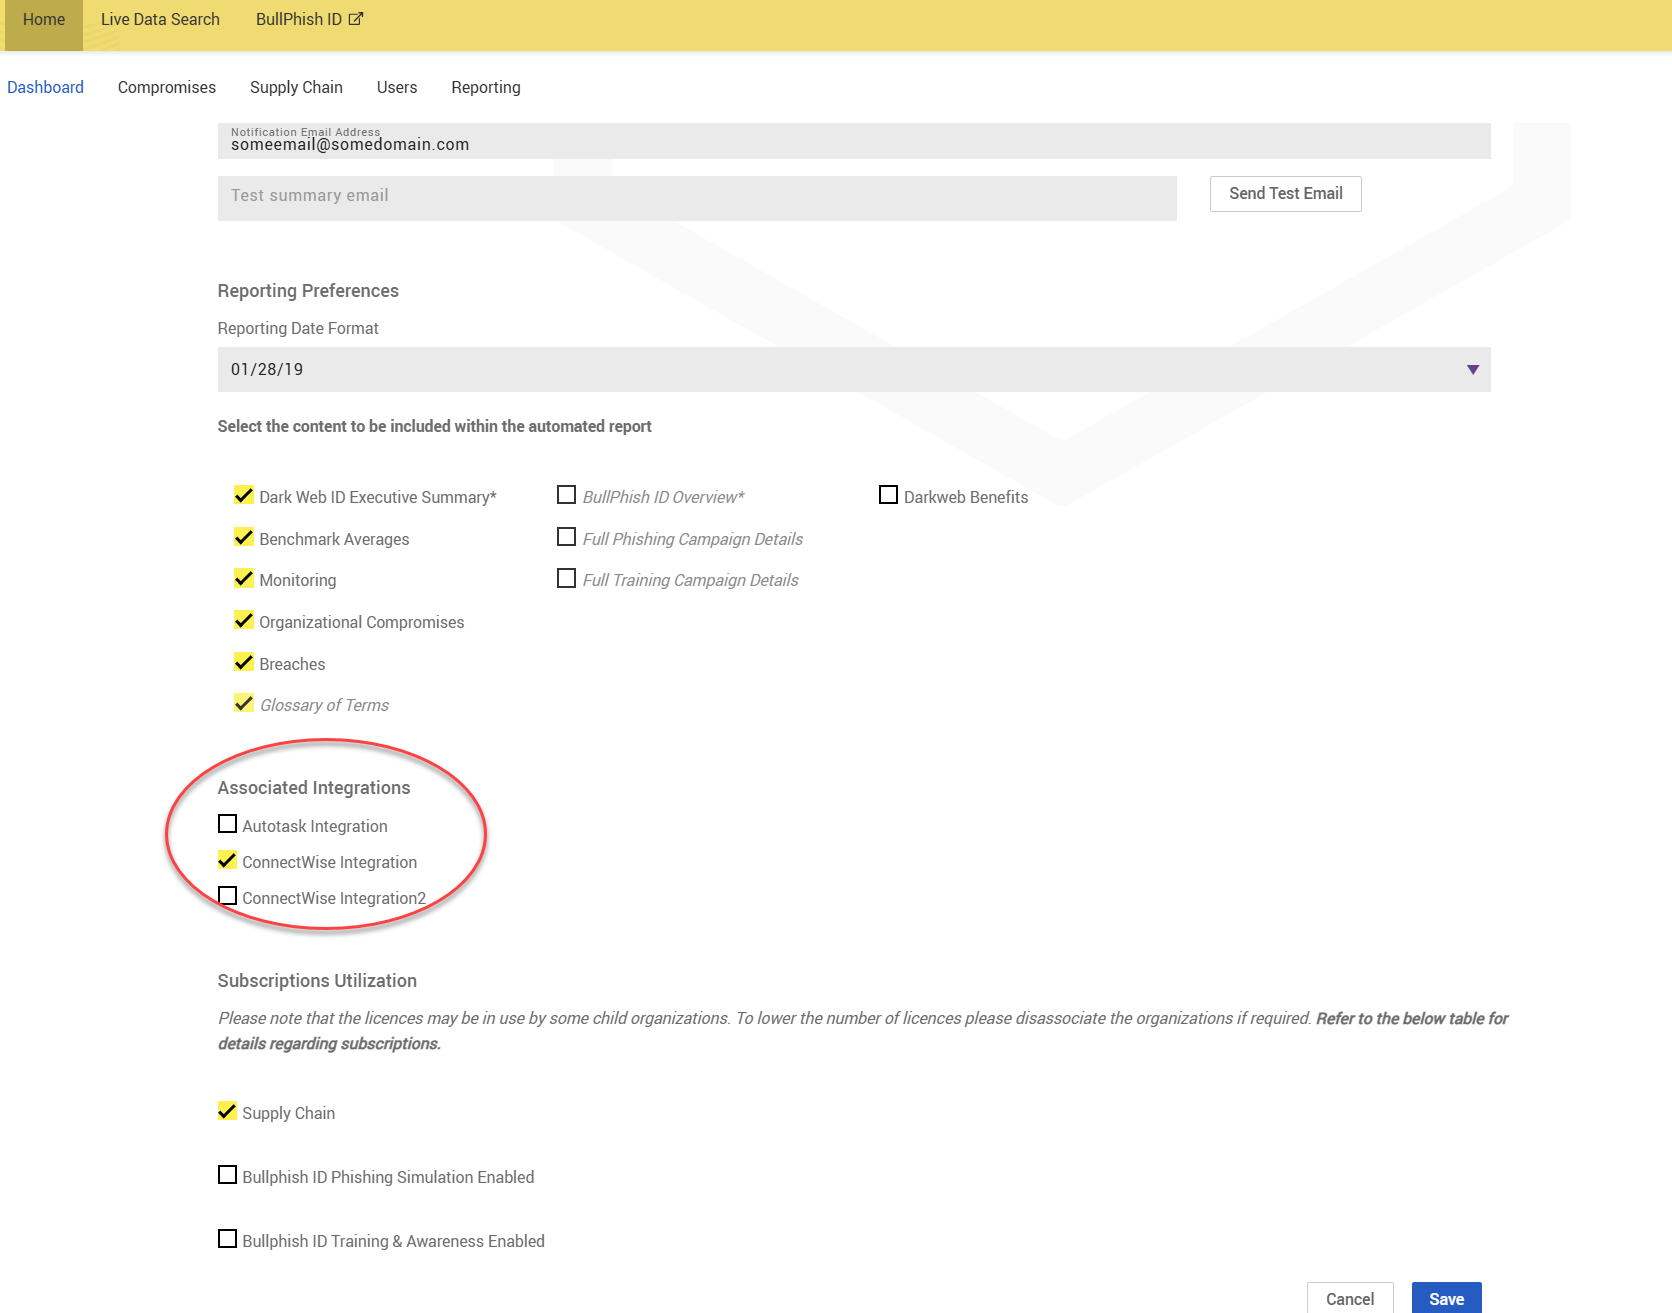
3. Scroll to the Associated Integrations section.
4. Select the ConnectWise Integration (or your given integration title) checkbox and click Save.
Enable an integration from the Integrations page
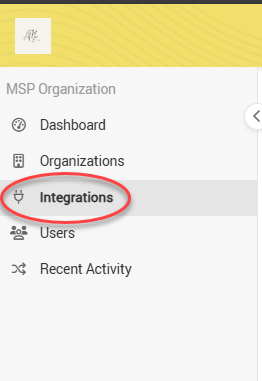
1. Open the Integrations page from the side navigation menu.
2. Locate the ConnectWise integration and click the pencil icon to edit it.
3. Click Edit to open the SMB Edit page of the organization you wish to modify.
4. Scroll down to view the Associated Integrations section.
5. Select the ConnectWise Integration (or your given integration title) checkbox and click Save.
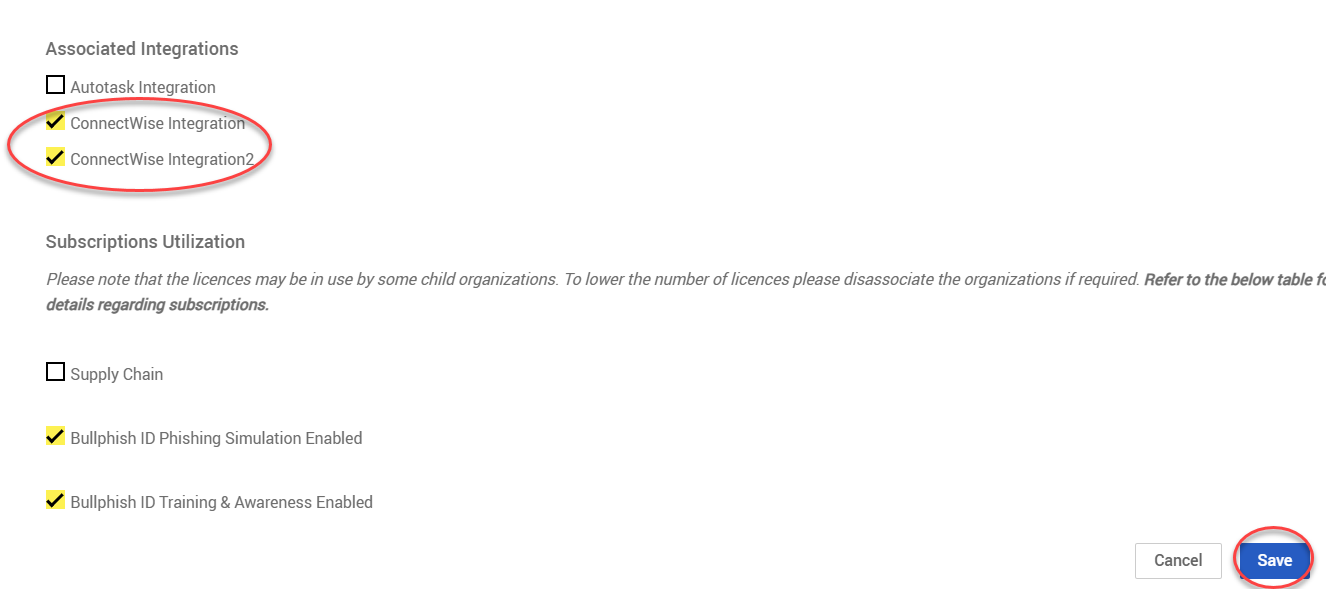
IMPORTANT If an organization is disabled, monitoring will continue, and the integration will remain active. While PSA notifications will still be generated, email notifications will not be sent to this organization. If you need to prevent PSA tickets from being created, you can do so by clearing the checkbox for the ConnectWise Integration (or the specific integration title) in the Associated Integrations section.
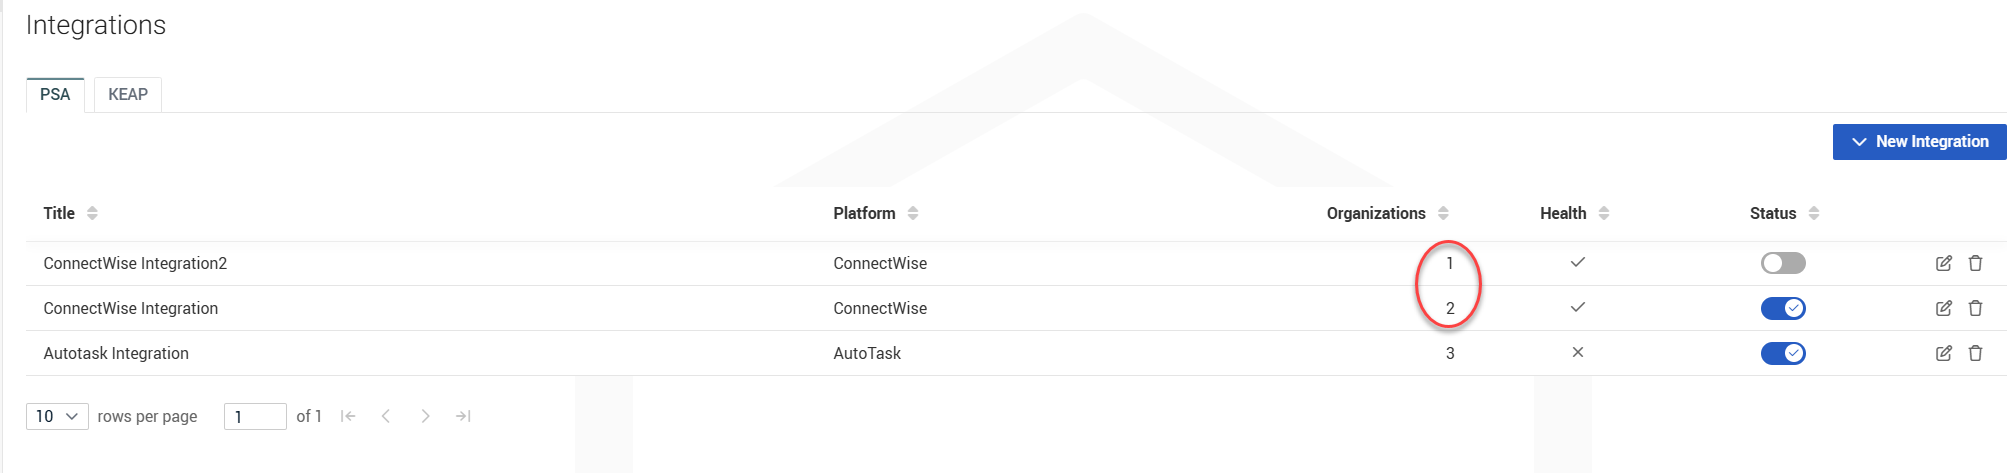
You can view the number of organizations linked to ConnectWise on the Integrations page.